Editing interfaces
Overall Organization
XR Kitting 3D editor is axed around a real-time 3D view of the kitting area, and many windows dedicated to the tools available.
Other specific views can appear depending on the context and are explained in this document.
The main editing window of XR Kitting looks like this:
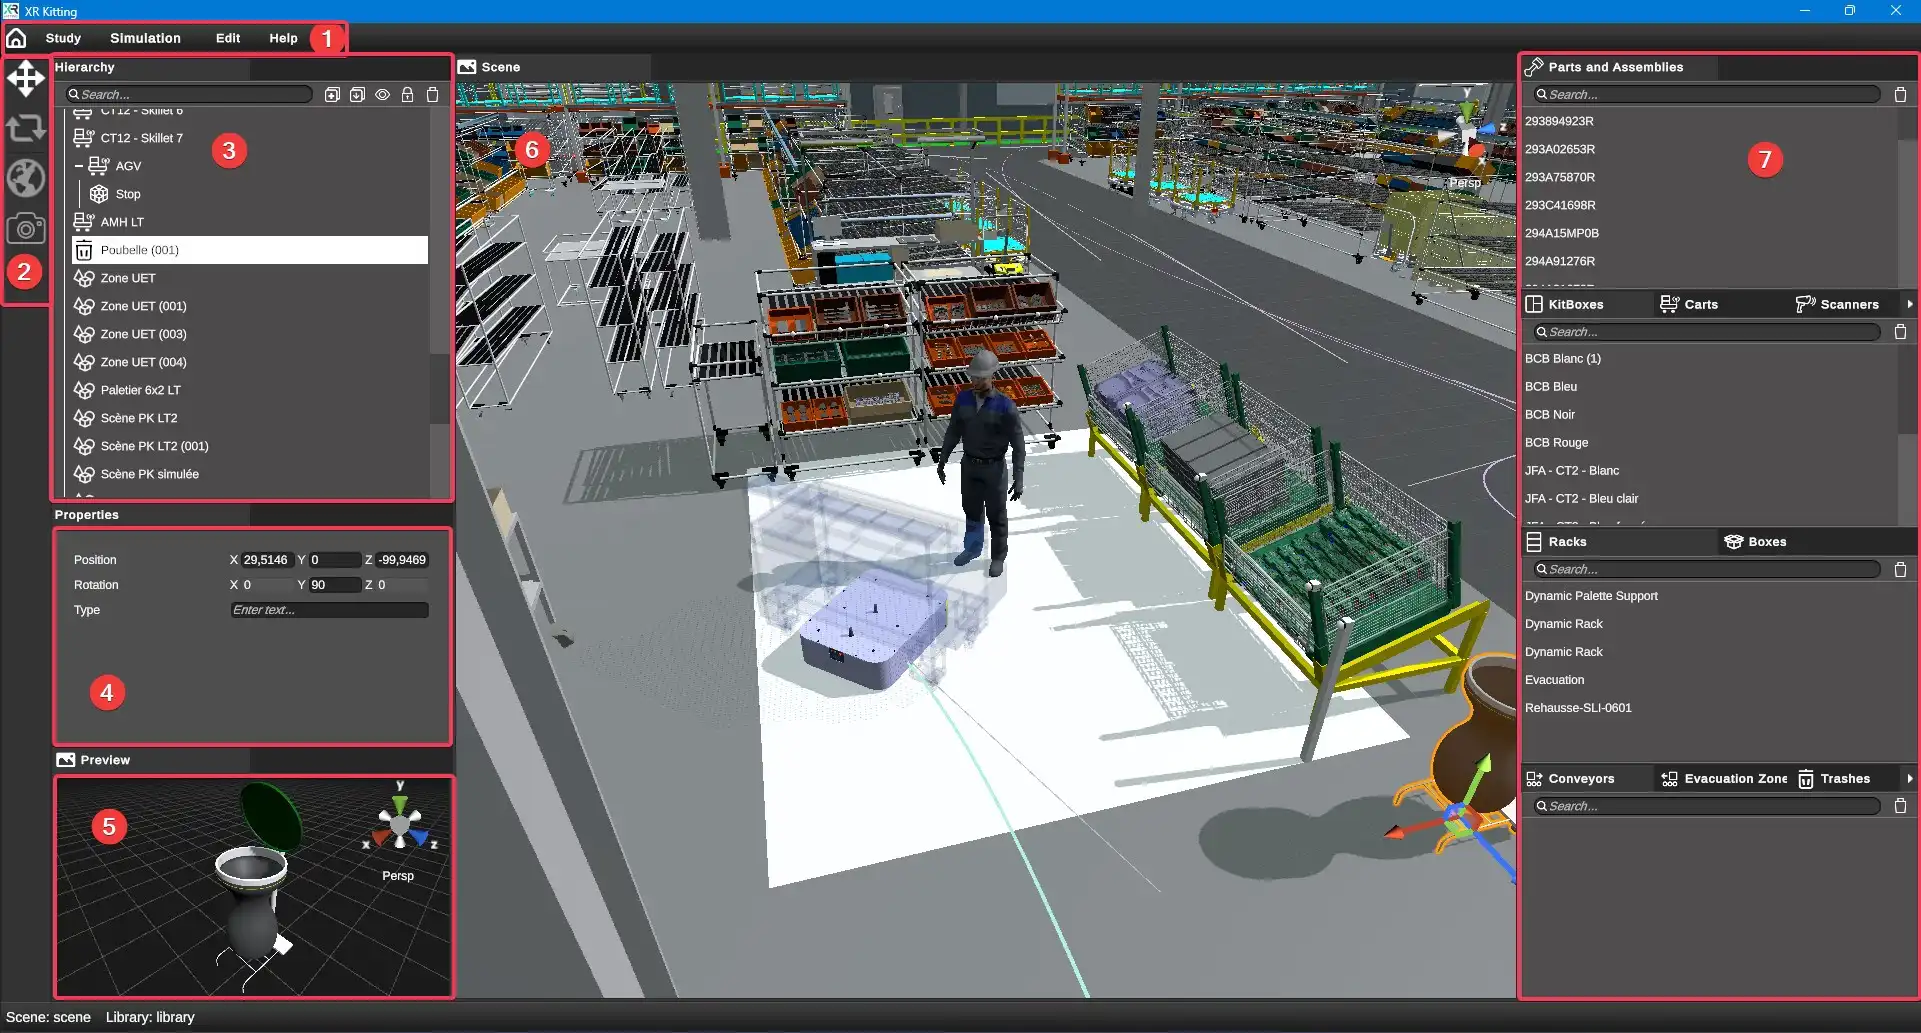
| Login | Definition |
|---|---|
| 1 | Menu et sub menu |
| 2 | Toolbar to modify 3D elements |
| 3 | Hierarchy tree : hierarchic view of the scene’s elements |
| 4 | Properties of the selected element |
| 5 | Preview of the element in the library |
| 6 | 3D View |
| 7 | Libraries |
Note
F11 allows to switch from the full screen application to the window’s mode at any time.
Customize the display
Every sub windows position can be customed by clicking on the title and moving the window by holding the left click.
You can also adapt the size (length, height) of these windows by moving their edges holding the left click.
You can reset the default layout of the windows in the menu Help/Reset layout.
Libraries and scenes
Data corresponding to a work project under XR Kitting are organized that way:
-
The Library : Here we began by importing various 3D elements depending on the sub library chosen. The library interface is numbered 7 in the visual above. We can also edit the selected element’s parameters in the library through the sub window 4 in the view above. The library needs to be seen as the place where you prepare various elements which can be then instantiated in multiple scenes (kitting areas).
-
The scene : The scene is the kitting area being edited in which elements from the Library or 2D plans for example, are instantiated. The 3D representation of the scene is in the part 6 in the view above. Its hierarchic representation is in the part 3: the hierarchy tree.
Menus
Menus and submenus are shown in zone 1 of the above view.
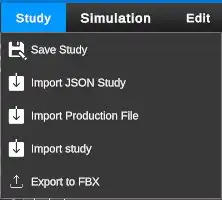
The Study menu allows you to:
- Save Study: Save the opened study.
- Import JSON Study: Import a study produced by the IOKitting tool.
- Import Production File: Import a production film.
- Import Study: Import libairies from a study into the study being edited.
- Export to FBX: Export the 3D scene to a 3D model in FBX format.
Import Study
The Import Study option lets you import all or part of the 3D parts from another study saved on your computer into the current study. When you select this option from the Study menu, an import window opens.
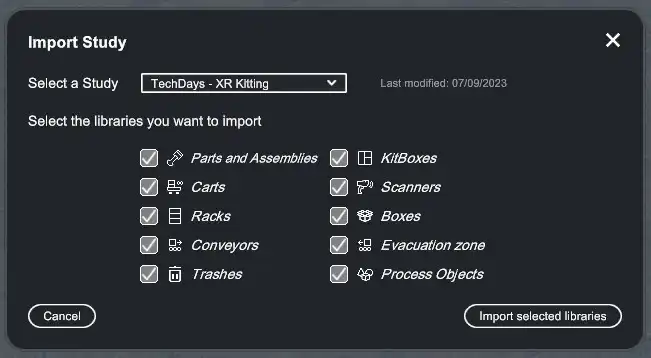
You can select a study from those created on your workstation in the Select study drop-down list.
Then you can choose to import all types of libraries, or select certain ones via the checkboxes.
Clicking on Import selected libraries will start the import process. Parts from the selected study will be imported into the libraries of the current study.
Simulation
The Simulation menu is used to enter Virtual Reality simulation mode. Entry into this mode is conditional on a set of elements required in the scene being present and correctly configured. If this is not the case, an information window appears listing the missing elements.
Edit
The Edit menu allows you to undo or redo actions.

Help
The Help menu offers the following options:
-
Documentation: Access the tool's user documentation.
-
Reset layout: Reset the position of 3D editor windows.

Toolbar

The toolbar allows the access to the following tools:
- Translation tool to modify the object’s position
- Rotation tool to modify the object’s orientation
- Referential change tool to modify the manipulation’s referential
- Screen capture tool to save an image of the 3D scene to customize the study thumbnail. The capture is saved in the study folder.
These tools (except screen capture) can be used if at least one element is selected in the scene. The chosen tool displayed a manipulator on the object, allowing you to modify its position or rotation. The tangibles axes of objects depends on the context: some furniture cannot be moved in height; it stays on the ground to avoid any bad manipulation.
The referential change tool had consequences on the two other tools: it allows to choose between local or global marker to manipulate the rotation or translation. When the earth icon is grey, the marker is local:
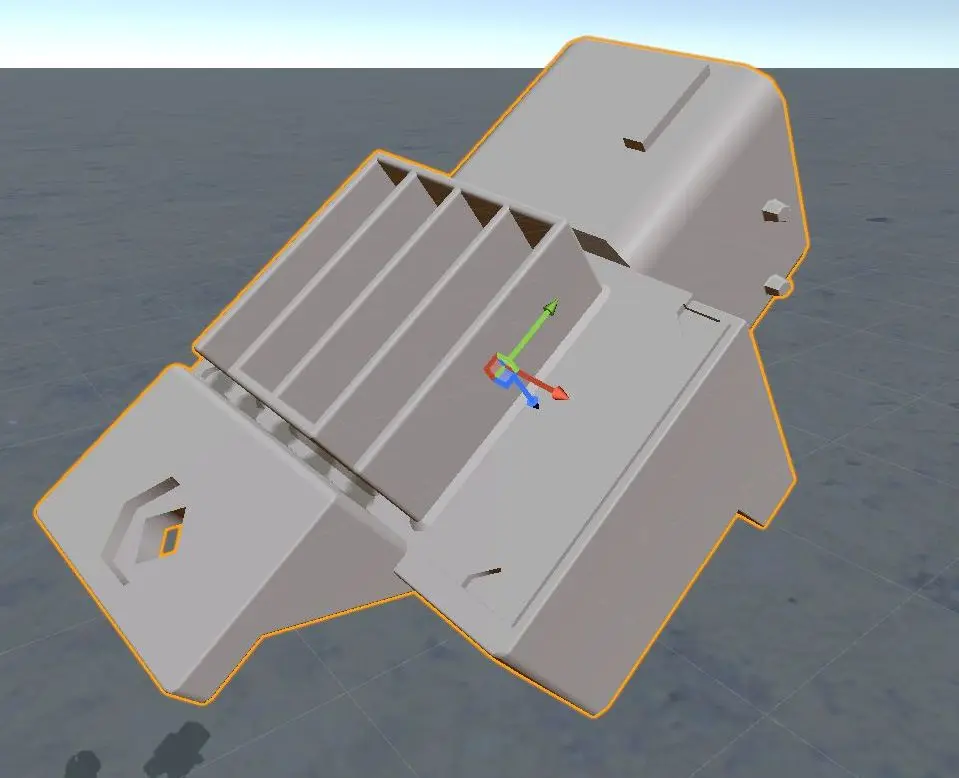
In this case the marker follows the object rotation.
When the earth icon is activated, the marker became global, and so stay in line with the world marker, no matter the object orientation:
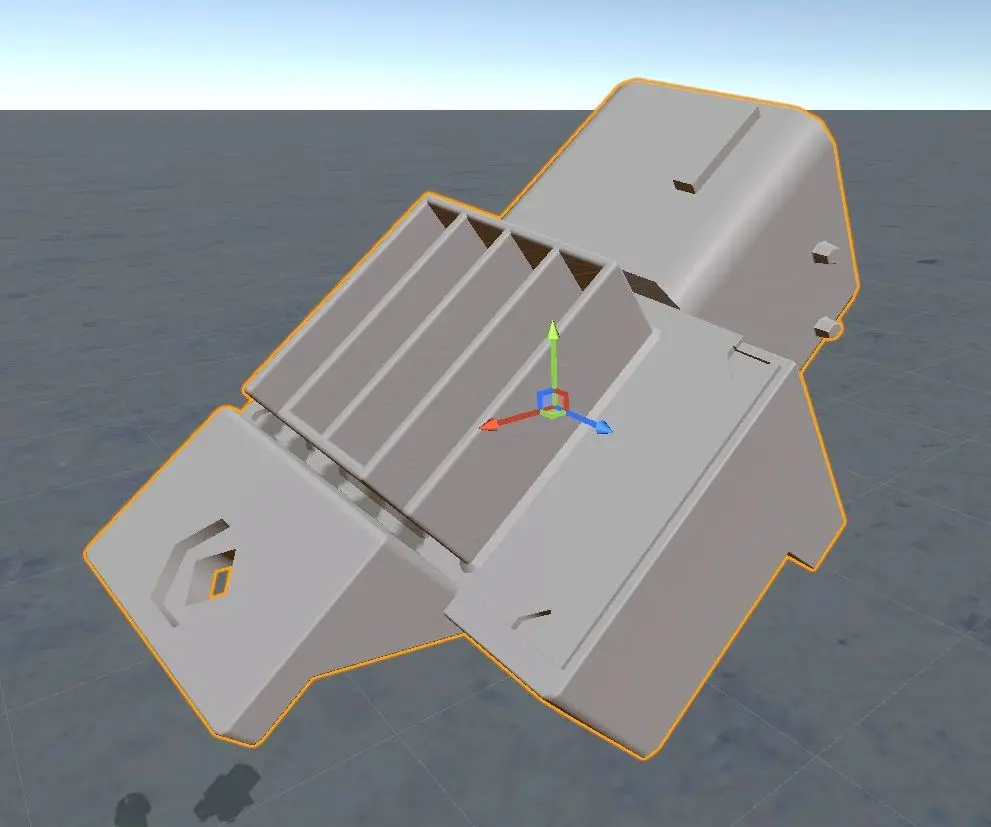
This marker change is useful during the placing of pieces in the kitbox – see the page The KITBoxes .
Navigation in the 3D
The navigation in the 3D kitting area view is completely made with the mouse help:
- The left click allows to turn the camera around the current point of view
- The right click allows to move on the camera plane
- The wheel allows to zoom in or out
Note
When a study is launched in the editor, the camera is centered on the virtual user. To center the camera on a 3D element, simply double-click on it!
The current view can also be manipulated thanks to the marker tool in the upper right corner of the 3D view:

This manipulator is clickable and allows to:
- Orient the camera along a global axis (top, front, or side view) by clicking on one of the axes.
- To go from the Perspective mode to the Orthographic monde by clicking on the Persp word.
We highly recommend using this tool that facilitates the comprehension of the spatial representation of the scene, and so allows to gain time on the objects’ placing step.
Check out this example of a classical perspective view, after having clicked on the X axe of the manipulator (side view):
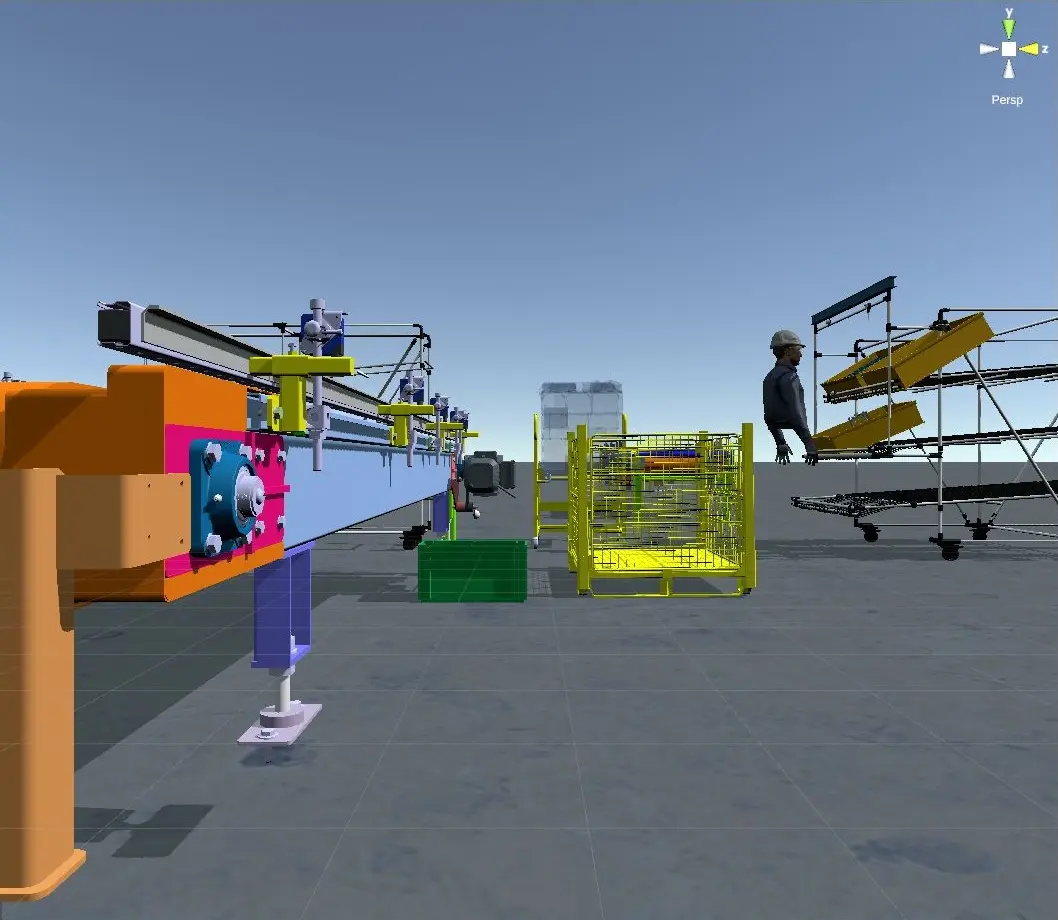
The objects’ agency is not easy due to the perspective. A simple click that Persp allows us to clarify things:
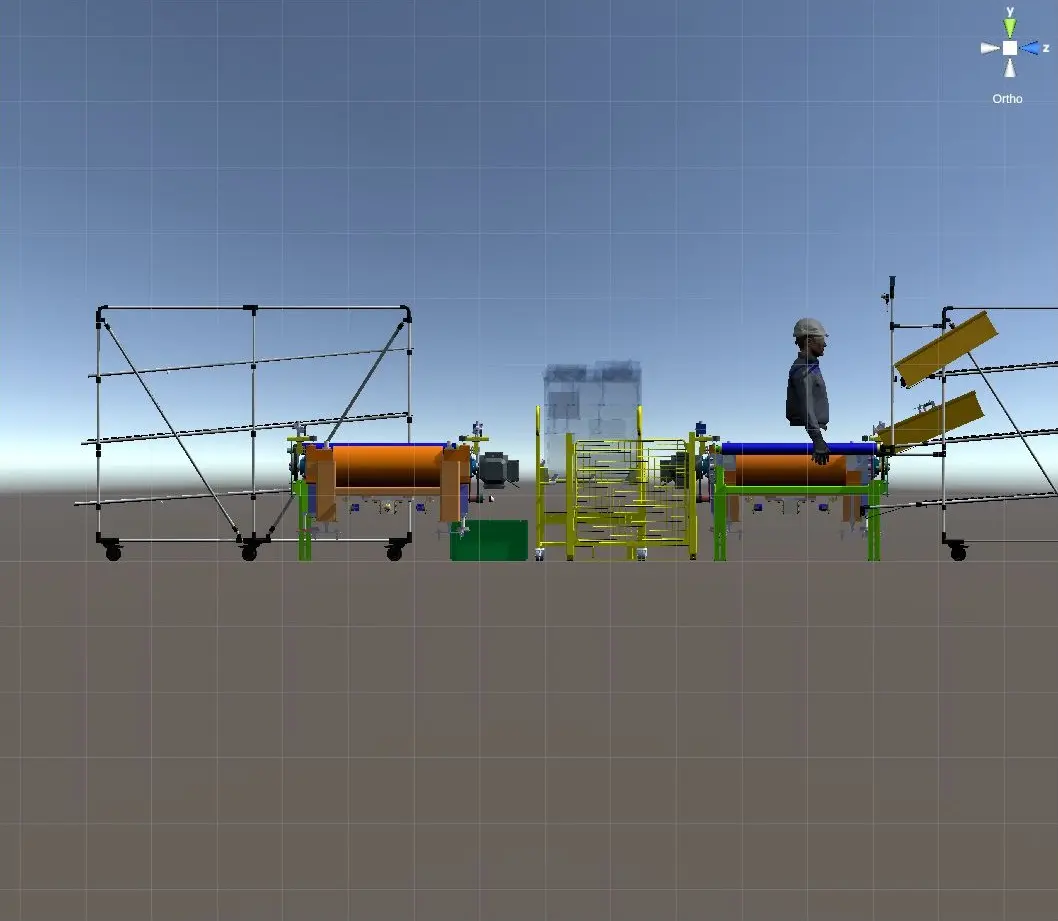
The master of the point of view positioning tools is essential to accelerate the creation of kitting scene. We recommend you spend time training on this point if you’re not familiar with it.
The Hierarchy tree
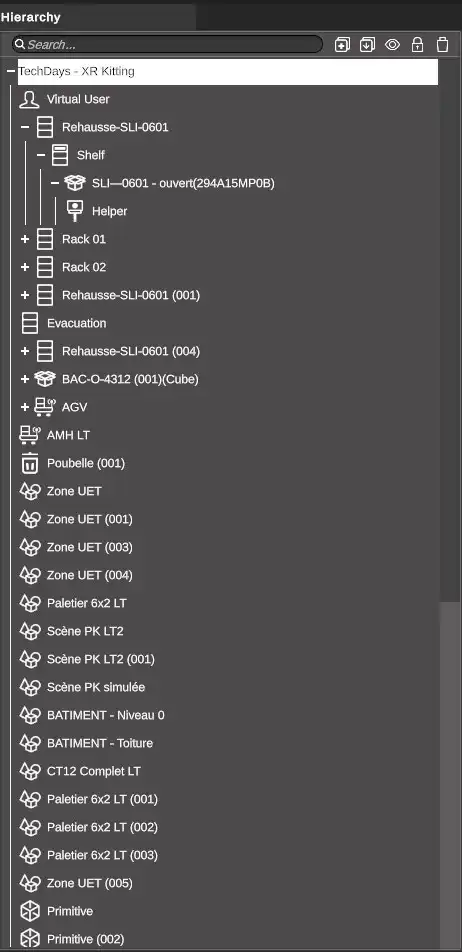
The hierarchy tree (Hierarchysub window) is an essential element of the hierarchy: it’s here that we can add objects in the scene by dragging and dropping them from the Library.
It is a hierarchic view showing all the elements and their relationship.
Each item with children can be unfolded or folded thanks to the + or – at its left. It is possible to open/close all the children of an item by choosing the "Collapse all children" or "Expand all children" option, available by right-clicking on an item.
Icons indicate the type of object instantiated in the scene.
Shortcuts
-
The icon
 allows to search an object in the scene. If we are looking for a child, its parent will be automatically displayed. For example, if I’m looking for an object that is in a box, in the hierarchy tree, the bow and the object will be displayed.
 -
The icon
 allows to duplicate an object. A duplicated object indicates a series’ suffix: 001, 002, etc. after the name of the duplicated object.
 -
The icon
 allows to duplicate an object with its children (a shelf with its boxes and its parts will be completely duplicate).
 -
The icon
 allows to hide/display an object of the hierarchy. The hidden elements here will be visible in VR.
 -
The icon
 allows to locked/unlock an object: a locked object cannot move.
 -
The icon
 allows to delete an object.
Note
Hover your mouse over shortcuts to display their function. These functions are also available by right-clicking on an element in the hierarchy.
Multiple Selection
The selection of multiple elements in the tree is possible if necessary (for example, to move or orientate several elements at once):
- Select various elements with the Control key (Ctrl) to do a multiple selection of distant objects in the hierarchy.
- Select with the Shift key allows to do a multiple selection but on only one range.
You will find details on the use of the hierarchy tree in several sections of this documentation. Every time we call a notion relate to the tree.
Create groups / nodes of elements
Since version 2.0.4, you can group elements together in a node. This group of elements can then be moved and hidden within the scene, facilitating the editing of complex scenes.
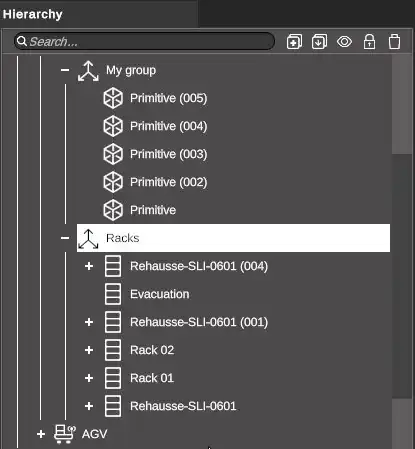
To create a grouping node, select one or more elements in the hierarchy, then :
-
right-click and select "Group selection".
-
use the keyboard shortcut Ctrl+G.
You can add elements to an existing group by dragging them onto the group name. A + sign replaces your mouse cursor to indicate that you are about to add the element to the group.
You can perform the action in the opposite way to remove an element from a group.
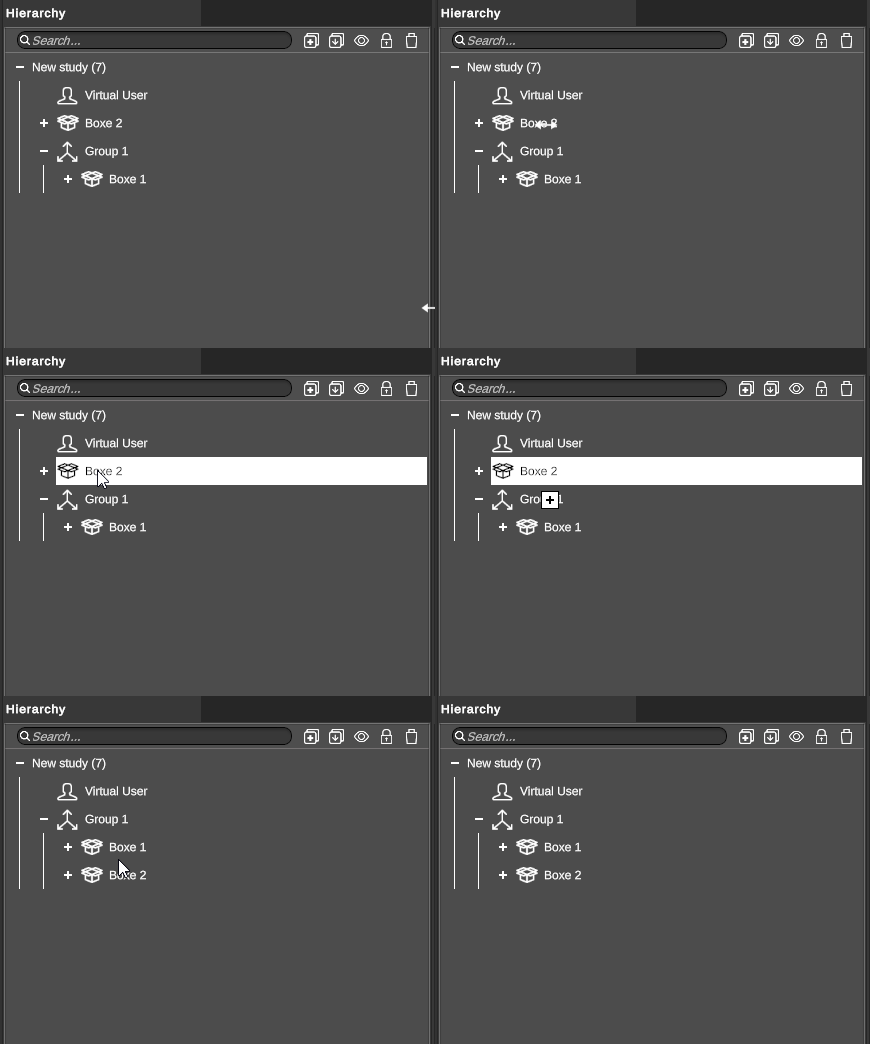
Groups can be nested within groups without limitation.
Automatic zoom on an object of the scene
A fast double clicks on one of the hierarchy tree’s elements allows to select it and to automatically centered the POV of the 3D scene on the object selected.
Rename elements in the hierarchy
A slow double click on one of the tree’s elements allows to rename it.
Move element in the hierarchy
You can change the order of elements in the hierarchy with the "Move up" / "Move down" actions accessible by right-clicking on an element.
Selection in the 3D view
All element or group of elements selected in the design will be highlight in the 3D view.
The same way, click on one element of the 3D view allows to select it. The element appears selected in the hierarchy tree which adapt its view to let us see the element which has just been selected.
Export packages and racks as FBX files
From the hierarchy, you can export boxes and racks as .FBX files. To do this, right-click on the item and select "Export to FBX".
Properties window
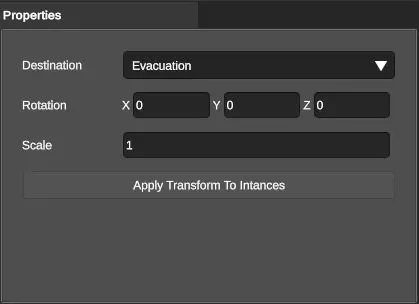
The Properties sub window display the properties of the selected element.
This element can be from the hierarchy tree of from the library.
Note
The current version of XR Kitting does not allow to edit properties when it is a multiple selection.
Other Editors
Interfaces and windows presented here are the content that is in the classic mode of the scene’s edition.
Other interfaces appeared during the edition of certain objects. These interfaces are described in the section Creation and Edition of Elements.