Control Camera
To look at your product and define the right angle to be captured, you can manipulate the camera to position it in the right place.
Two types of cameras are available by default:
- Orbital: move around the product
- Fly: move freely in the scene
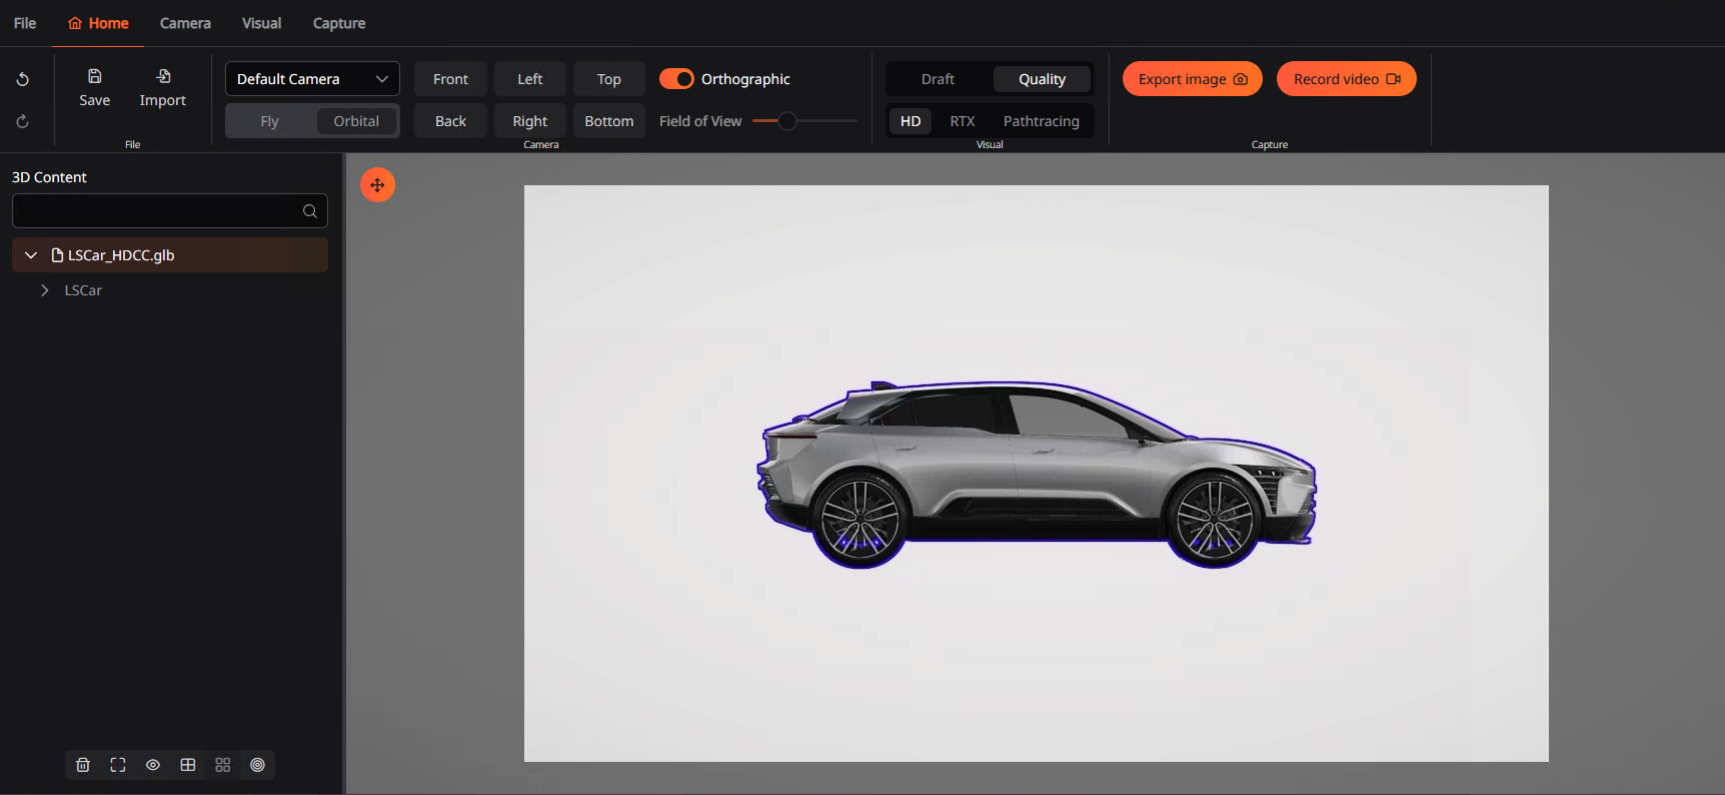
By default, the orbital camera is activated. You can change the camera in the “Home” or “Camera” tabs or use the F1 to toggle between Orbital and Fly modes.
Orbital
To control the orbital camera, you can use your mouse:
- Pan camera: Middle Button click & hold
- Increase/decrease zoom: Middle Button +/-
- Rotate around: Left Button click & hold
By default, the center of this camera is set at the middle of the overall volume of all imported models in the scene. You can recenter the camera on a specific point in the scene by using the Focus function or use F.
Fly
To manipulate the fly camera, you can use your mouse and keyboard:
- Pan camera: Middle Button click & hold
- Increase/decrease zoom: Middle Button +/-
- Look around: Left Button & hold
- Move around: ZQSD / LeftRightUpDown
Imported Fixed Camera
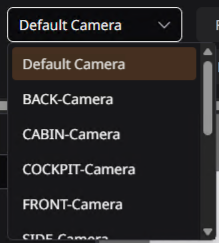
If the imported GLB file contains fixed cameras, they will be shown in the camera selection menu located in the “Home” and “Camera” tab.
When a fixed camera is selected, it is not possible to change the camera's position in the viewport.
Camera mode
Cameras can be rendered in either orthographic or perspective mode. You can activate the “orthographic” mode in the “Camera” tab or by using F2.
In perspective mode, objects appear smaller as they get farther from the camera, which closely mimics how the human eye perceives the world. This is ideal for realistic visualizations and immersive experiences.
In contrast, orthographic mode displays objects at the same scale regardless of their distance from the camera, making it useful for technical views, architectural plans, or any situation where accurate measurements and proportions are important.
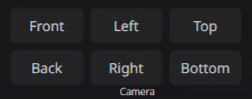
Predefined camera positions
Six predefined camera positions are available to quickly move the camera to exact positions. Those positions are available as buttons in the “Camera” tab and can also be triggered using the numpad of your keyboard:
- Num 2 : Back
- Num 3 : Bottom
- Num 4 : Left
- Num 6 : Right
- Num 8 : Front
- Num 9 : Top
Num pad layout:
| 7 | 8 = Front | 9 = Top |
|---|---|---|
| 4 = Left | 5 | 6 = Right |
| 1 | 2 = Back | 3 = Bottom |
Field of view
The camera's field of view (FOV) can be adjusted using a slider in the “Camera” tab.
Field of view refers to the extent of the observable scene that a camera can capture. Unlike zoom, which magnifies a specific area of the image, changing the FOV alters how wide or narrow the scene appears without actually enlarging the objects.