Create group session (host)#
To initiate a group session in XR Twin as Host, follow these steps:
1. Choose Simulation Project#
Launch XR Twin and select the simulation project that you want to share with other users. Ensure that the project is prepared and ready for collaborative use, and that it works correctly in a solo session.
2. Export Project#
Before creating the group session, export the project. This ensures that all participants have access to the exact same simulation file. Click here to find out how to export a project.
3. Send Project to Participants#
Share the exported project file (.xrproj) with the participants. You can send it via email, filesharing services, or any other preferred method.
Warning
Ensure that all participants, including yourself as the Host, are using the exact same simulation file. Any deviation in the simulation file will lead to failure in starting the group session.
4. Choose Project in Launcher#
Within the XR Twin Launcher, select the simulation project that you want to use for the group session.
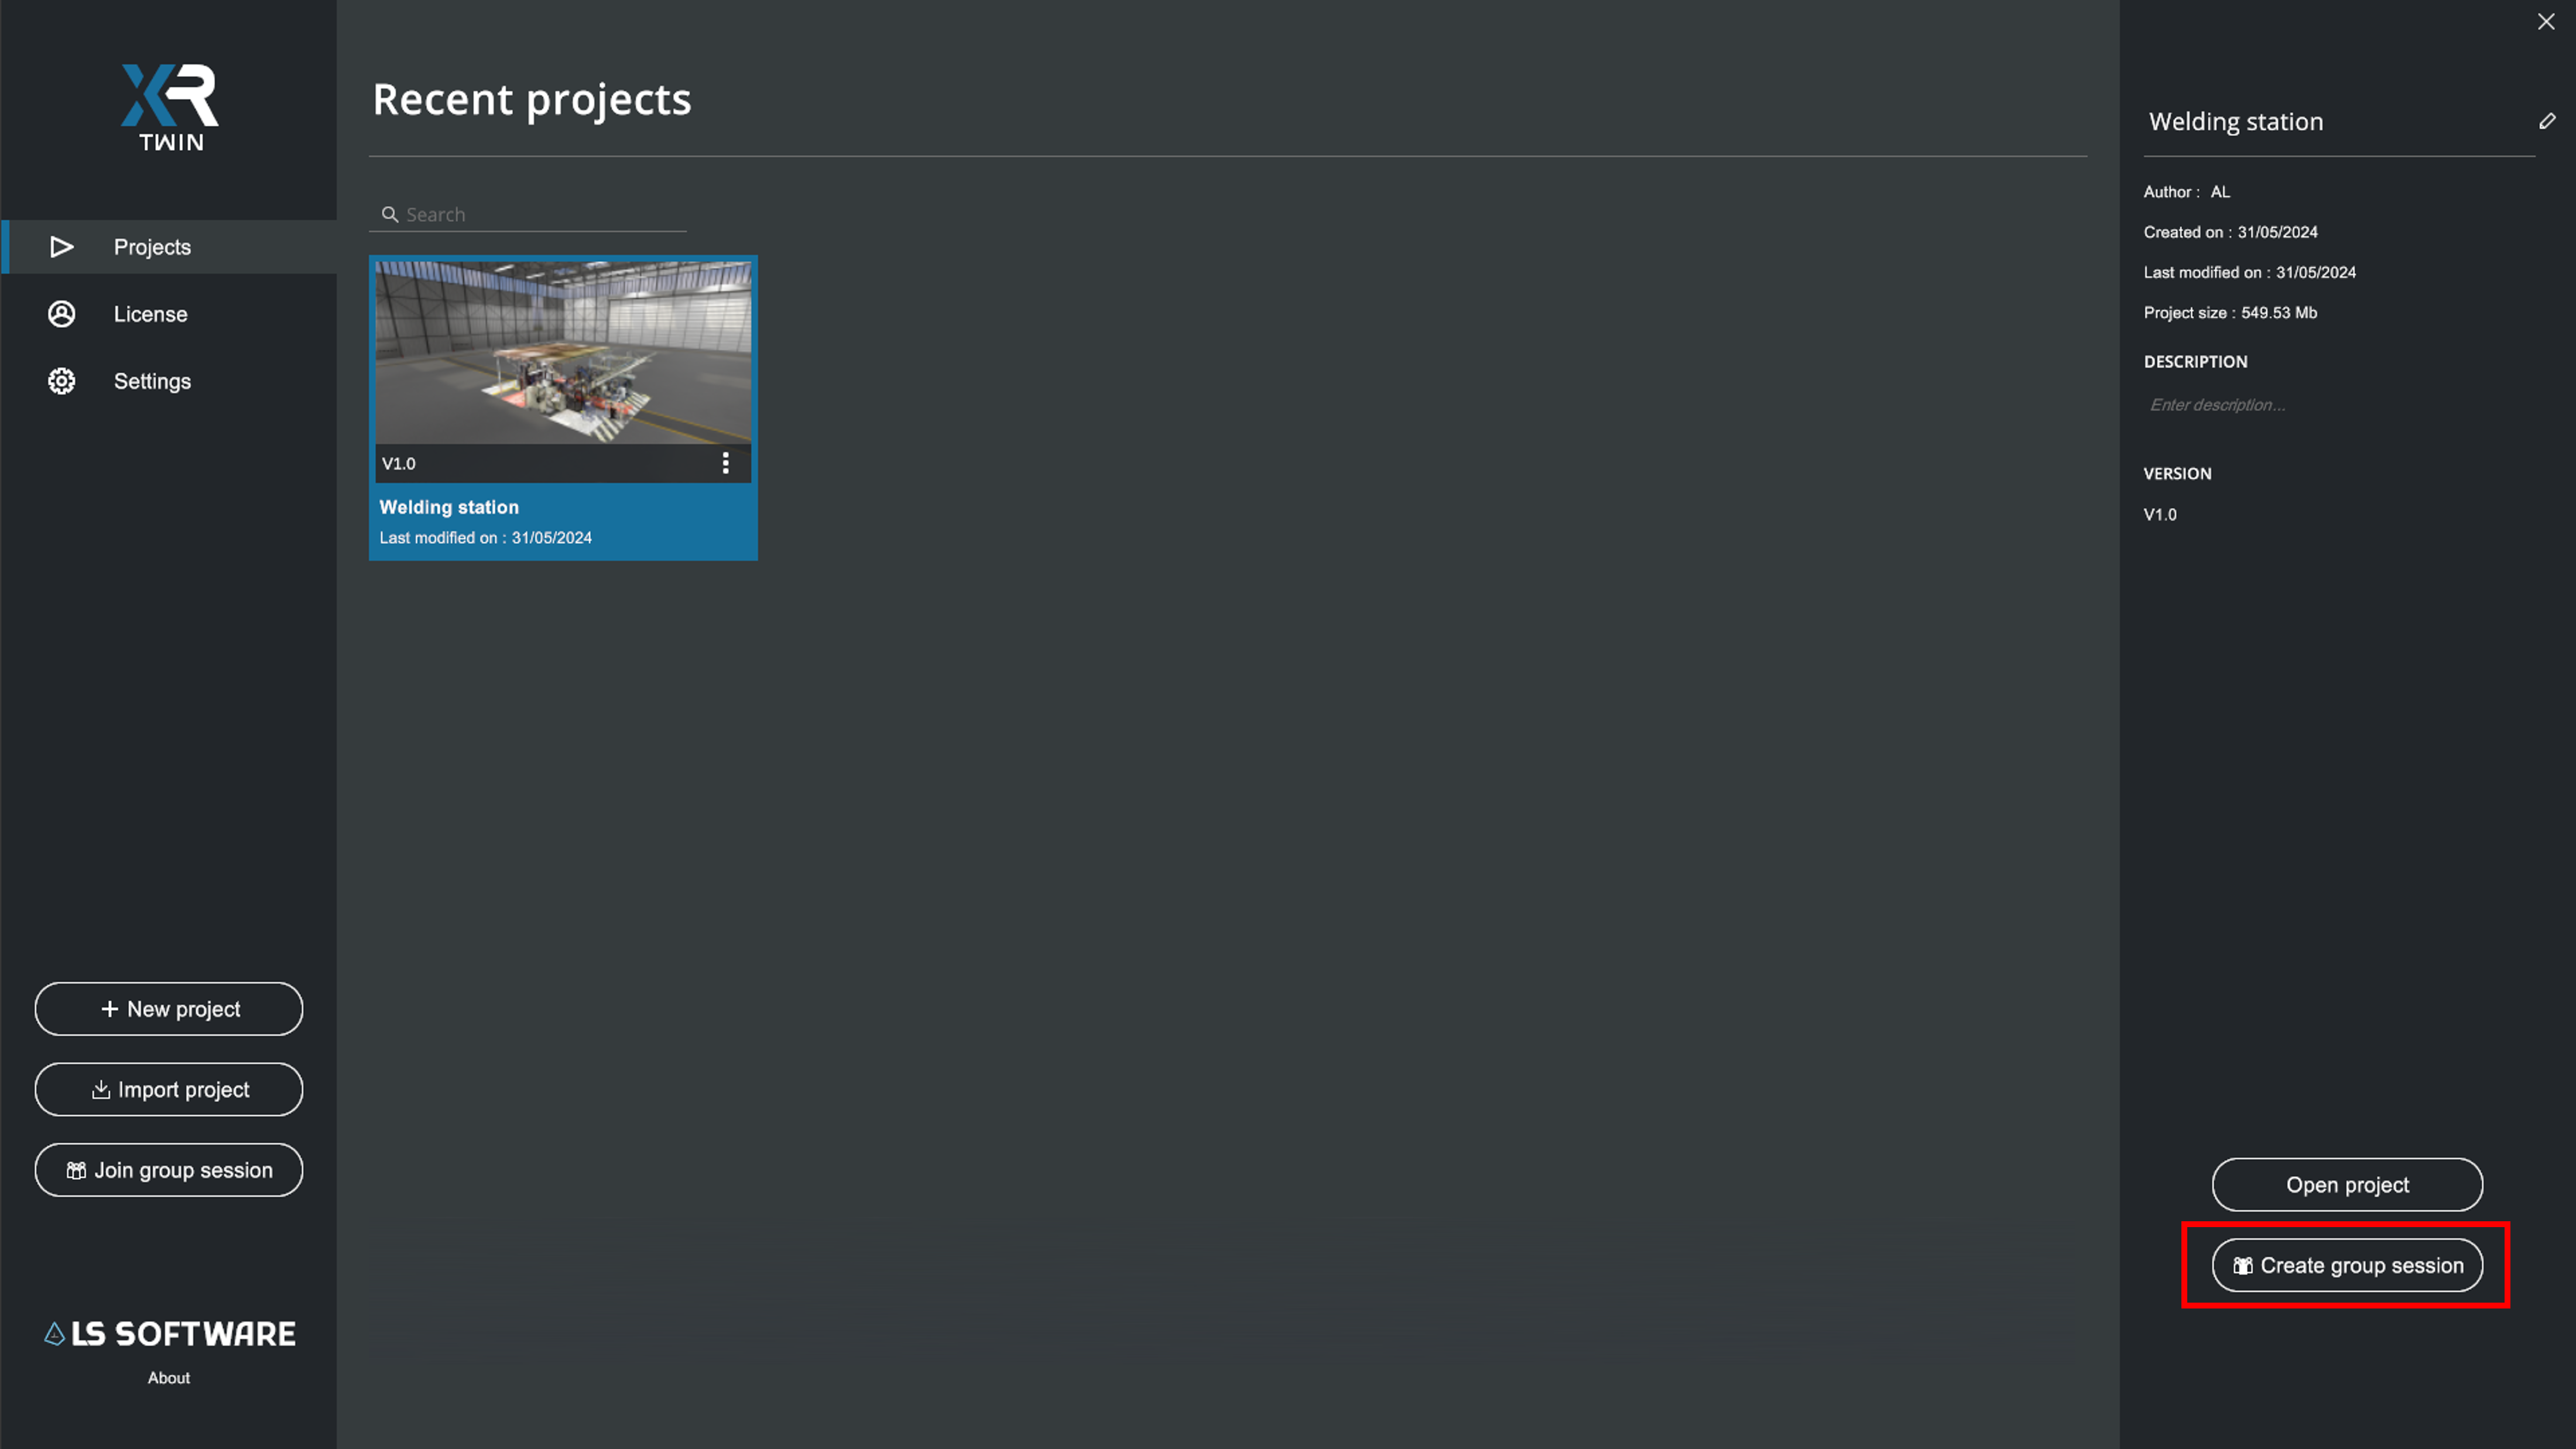
5. Create Group Session#
Click on the Create group session button  at the bottom right in the XR Twin Launcher interface.
6. Session configuration#
When creating a group session in XR Twin, you have the option to configure connection mode and user settings in the Session login configuration pop-up.
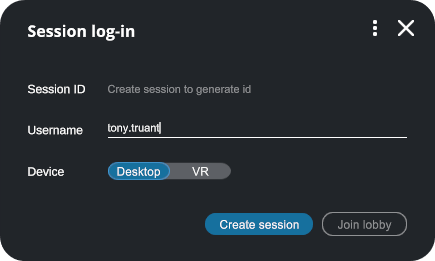
To configure your session:
- Connection Mode:
Select between Online (server-based) or Local (LAN-based) mode: - Online Mode: Uses external relay servers for collaboration. Supports all features including audio communication. Requires internet connectivity.
- Session ID (Online mode only):
A session ID will be generated automatically in the next step.
- Session ID (Online mode only):
-
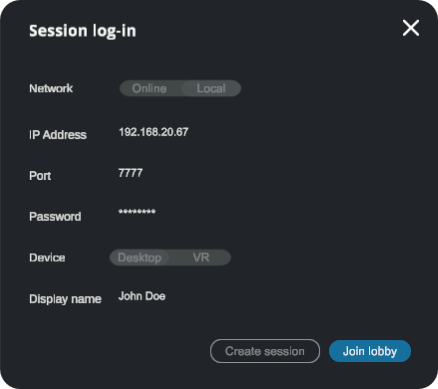
Local Mode: Direct peer-to-peer collaboration over local network using IP and port. Designed for companies with restrictive network policies. Audio (VoIP) is not supported in this mode.
- IP Address and Port (Local mode only):
When Local mode is selected, enter the IP address and port where the session will be hosted. This information must be shared with participants to allow them to join.
- IP Address and Port (Local mode only):
-
Password: Optional. Add a password to secure the session if needed.
- Device:
You can select your preferred device type for the session: Desktop or VR.
This choice determines your interaction mode within the virtual environment. You can change it later, in the Lobby. - Username:
You can change your username if necessary.
By default, it's usually set to the name of your Windows session. This username will be displayed at the top of your avatar during the group session.  Click this button to abort and return to the Launcher.
After configuring the session, click on the Create session button.
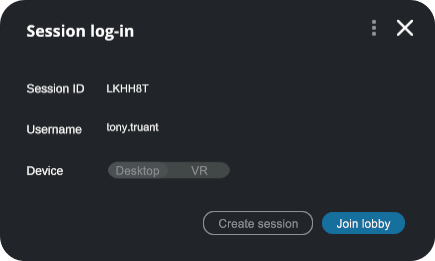
7. Session Information#
Depending on the selected mode, you will see different connection information:
Online Mode:
An unique Session ID will be generated.
Local Mode:
The IP address and port you configured will be displayed for confirmation.
 Click this button to Join Lobby,
  currently unavailable.
- Click this button to abort session and return to the Launcher.
Click the Join Lobby button to join the Lobby and wait for other participants to join.
8. Joining the Lobby#
Once inside the Lobby as Host, you can wait for your Guests to join the session. In Lobby pop-up, you can chat with them, send session information, change your appearance and device. You can copy the connection information and send it to participants to join. They can use this information to access the session from their devices (see Join group session as Guest).
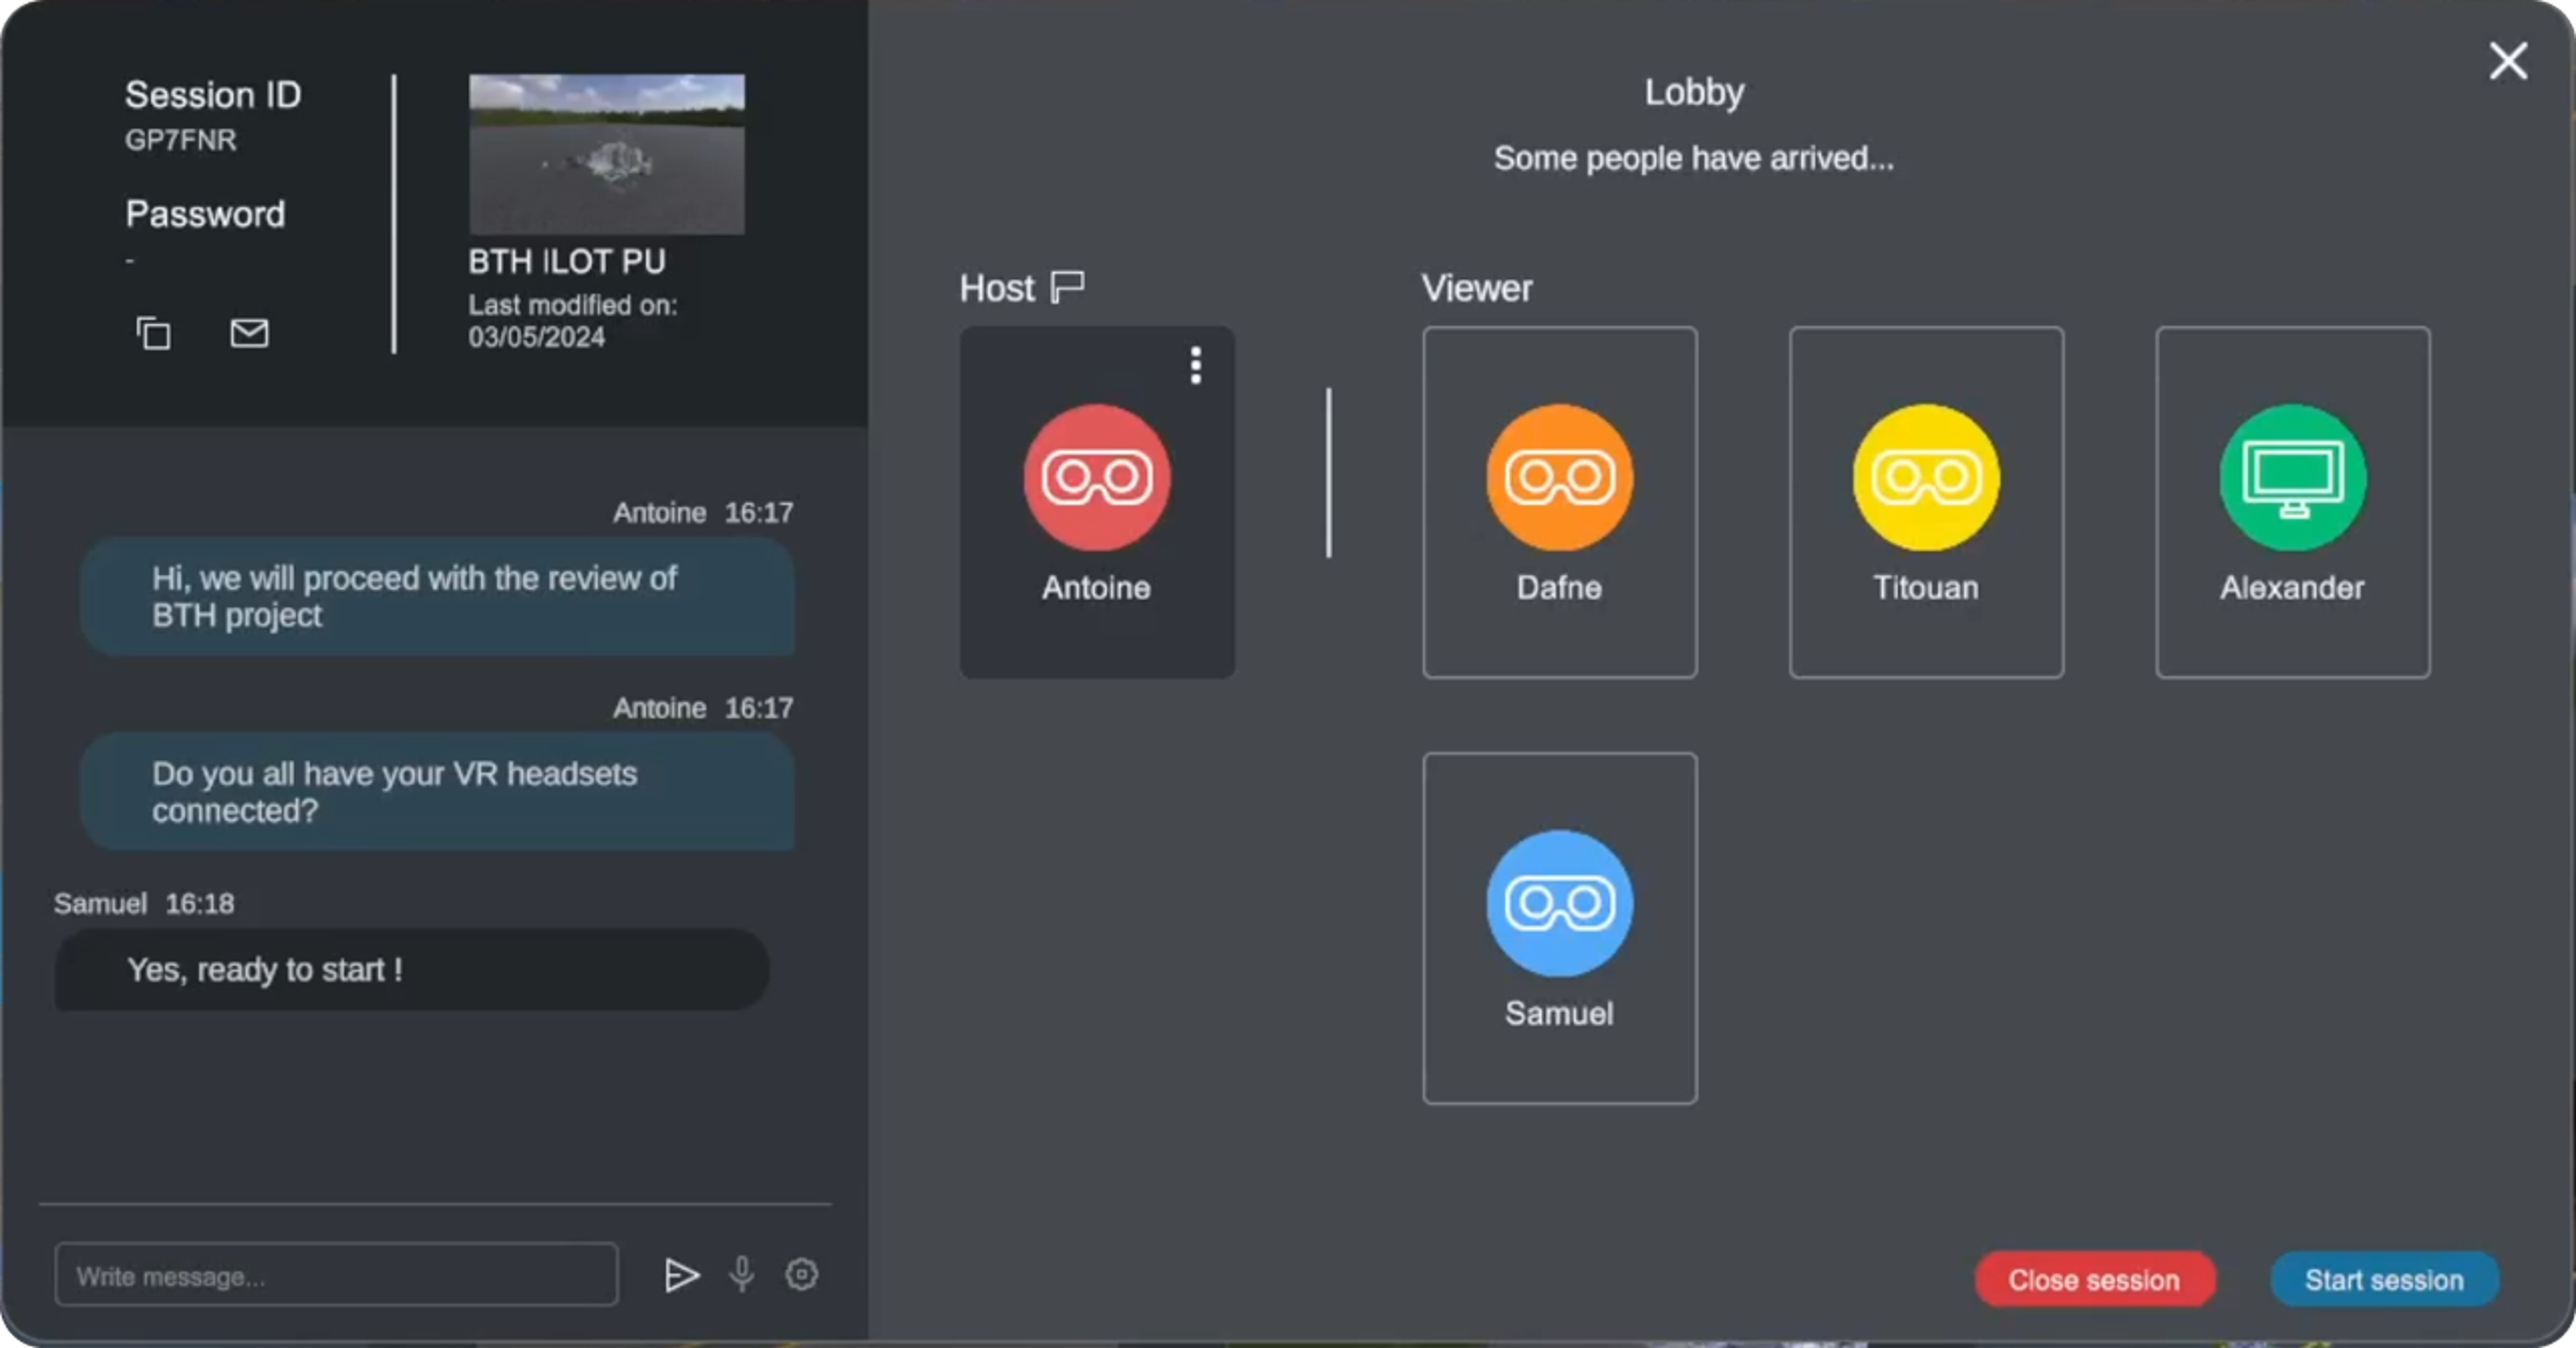
- Connection Information:
Depending on the mode:- Online Mode: Session ID that each participant must use to join the session.
- Local Mode: IP address and port that each participant must use to join the session.
- Copy:
Click on the Copy icon to copy connection information to the clipboard.
 - Send:
Click on the Send e-mail icon to open a mailto in your default mail client.
 - Project:
Name and last modification date of the sharing project. - Chat:
Feel free to send chat messages readable by all participants. Type your text and click on the Send icon . See Chat.
 -
Audio (Online mode only):
In XR Twin, the audio feature facilitates real-time communication among participants in Online mode. See Audio. Note that audio is not available in Local mode. -
To change your color or your device as Host, click on the three dot menu icon
 .
.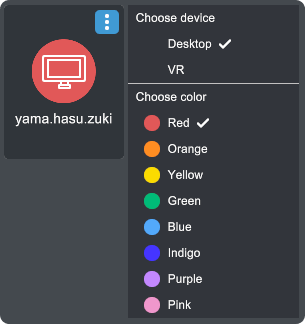
- Choose Device:
While in the Lobby, you have the option to change your device selection between Desktop and VR. This allows you to adapt your settings based on your available hardware or preferences. - Choose Color:
Additionally, you can customize your guests experience by changing the color of your avatar within the Lobby interface. This helps distinguish between different participants and enhances visual clarity during collaboration. Each participant can change his or her own color.
- Choose Device:
9. Begin Collaboration#
Once all participants have joined the session, you can begin collaborating in realtime within the shared virtual environment.
- As Host, from your Lobby, click on the bottom right Start session
 button.
 - Your simulation session starts.
- At the same time, the simulation session will begin for all of your Guests.
- Wait for scene and physics initialization. Some of your guests may be slower, depending on their computer configurations.
- You will see your guests' avatars in your local scene. In turn, each of your guests will see all the other participants in their local scenes.
- You can communicate with your guests via voice (Online mode only, via chat coming soon).
As Host you have the privilege to interact with objects, other participants (the Guests) are viewers only.
10. End Session#
When the collaboration session is complete, you can choose to end the session by clicking on Stop Session  button (top left).
Ending the session as Host will close the simulation session for all participants (the Guests).