Configure the user#
Configuring the "User" in XR Twin allows you to select the type of hardware you are using and set up the desired display and interaction devices. Here's how you can configure the user in XR Twin.
Configure your main User#
1. The Add User dialog#
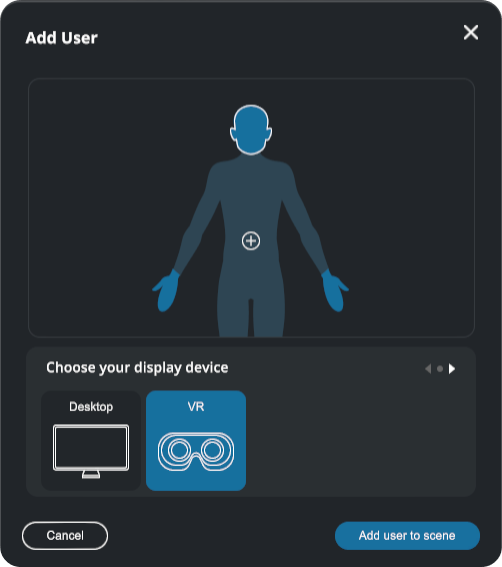
The Add User dialog lets you configure the User options. You can open this dialog in two ways, from the Hierarchy panel or from the dropdown menu.
- Using the Hierarchy: Locate the object named "User" left-top in the Hierarchy list, with this icon
 . Right to it, find the
  button. Click on it to open the Add User settings dialog.
 - Using the Project Menu: At the top of the XRTwin interface, find the dropdown menus. Click on "Project" menu and then select "Add user" to open the Add User settings dialog.
Click on the different silhouette's parts to configure the User according to your needs and available hardware. Alternatively you can click little Next/Previous  arrows.
By default, this options are selected: Desktop, VR controllers and no body tracking.
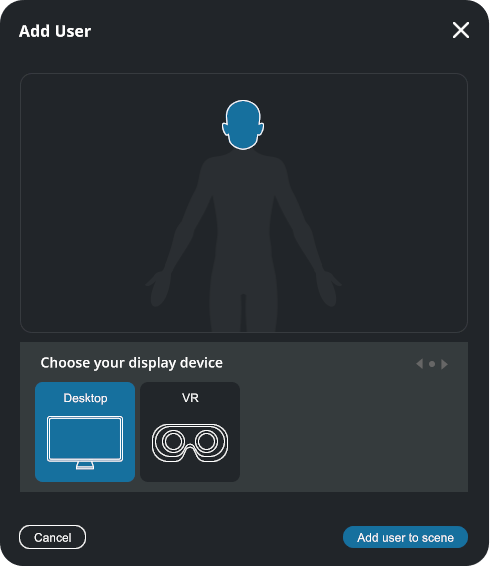


2. Choose your Display device#
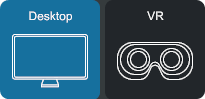
In the Add User dialog, choose whether you are using XR Twin in Desktop or VR mode.
In Desktop mode (default), the simulation will be rendered on the screen in 2D, and you can interact with objects using your mouse or specific manipulation devices, such as a haptic force feedback arm (see haptic devices).
In VR mode, you will incorporate a virtual avatar, with its head position matching the position of the VR headset and its hands controlled by the VR controllers. XR Twin supports most VR headsets on the market that are compatible with the OpenXR standard (see VR in XR Twin).
If VR is selected, you can click on the next button or the silhouette's hands to access additional VR options.
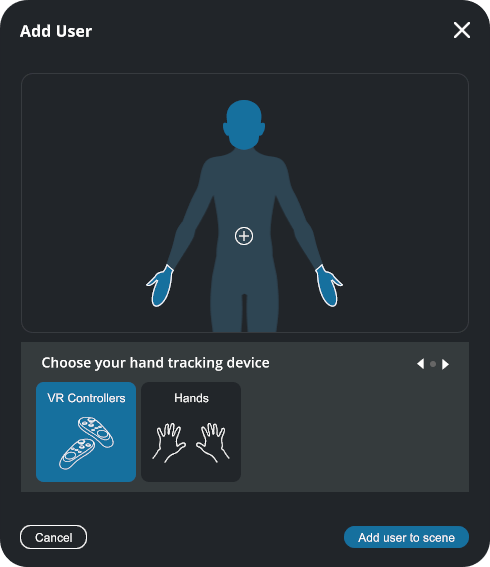
3. Choose your Hand Tracking device (optional)#
![]()
By default, the VR setup will use both VR controllers as interaction devices.
You can further enhance the user experience by selecting Hands.
![]()
This enables your OpenXR compatible hand tracking device and no more controllers are needed! XR Twin uses OpenXR and supports all OpenXR compatible hand tracking headsets such as VIVE Focus3, Quest3 and others (See Hardware).
Alternatively, XR Twin can use other OpenXR compatible devices such as Leap Motion (see Leap Motion) or Manus VR gloves (see Manus).
Click on the next button or the silhouette's "plus" button to access the next options.
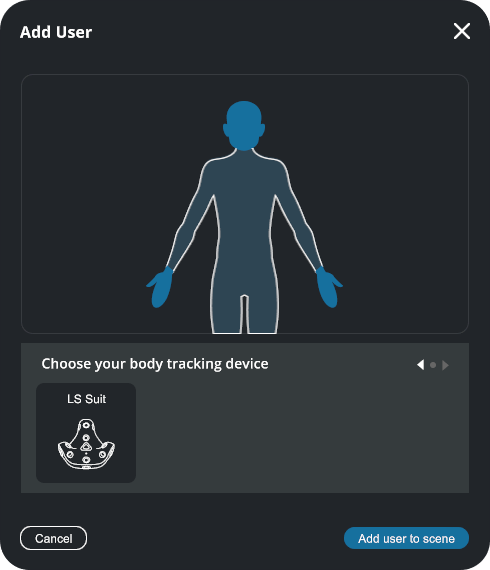
4. Select the body tracking LS Suit (optional)#
![]()
For precise body motion capture and ergonomics analysis (see Ergonomics), XR Twin supports the use of body tracking suits. Click on the Next button or the silhouette's body in the Add User pop-up to explore the options. XR Twin currently supports the LS Suit using five VIVE Trackers or VIVE Ultimate Trackers.
Once you have finished configuring the user settings, click on the Add User to Scene button. This action will create the avatar and set up the corresponding configuration based on your selections.
By following these steps, you can customize the user's hardware setup and interaction capabilities in XR Twin.
Add a manipulator#
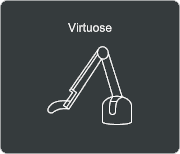
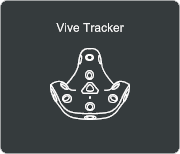
During your simulations, you have the option of using manipulator devices to move your objects in addition to your virtual hands. You can use a SpaceMouse, ViveTrackers or a Virtuose force-feedback device.
To add a new manipulator device:
- Connect the desired device.
- Open XR Twin and open your project.
- Select the User in the Hierarchy panel (left)
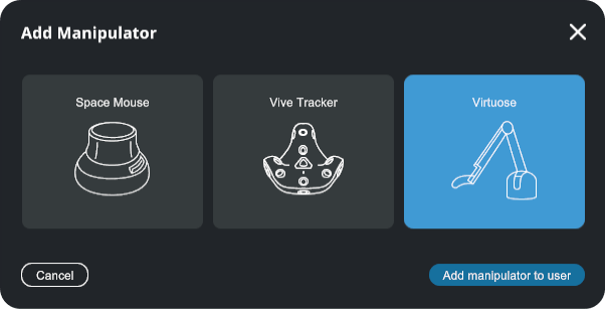
- In the Inspector panel (very bottom right), click the Add Device button

- Select the device/manipulator you want to use (SpaceMouse is the default). See Supported devices below for details.
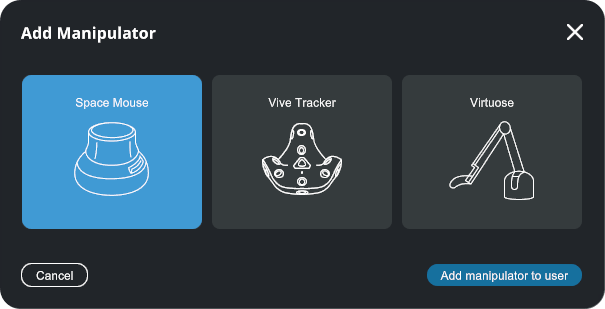
- Click the Add manipulator to user button to confirm your selection and close the pop-up.
- A new MANIPULATOR component is added in the Inspector panel. The available options depend on the selected device.
- To control your object, complete the MANIPULATOR component, start the simulation and operate the device. See Supported devices below for details.
Supported devices#
You can add three manipulator types: SpaceMouse, VIVE Trackers, Virtuose. See below for installation instructions, links to manufacturer websites, and quick setup steps.
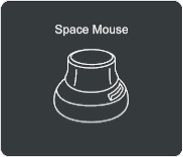
SpaceMouse#
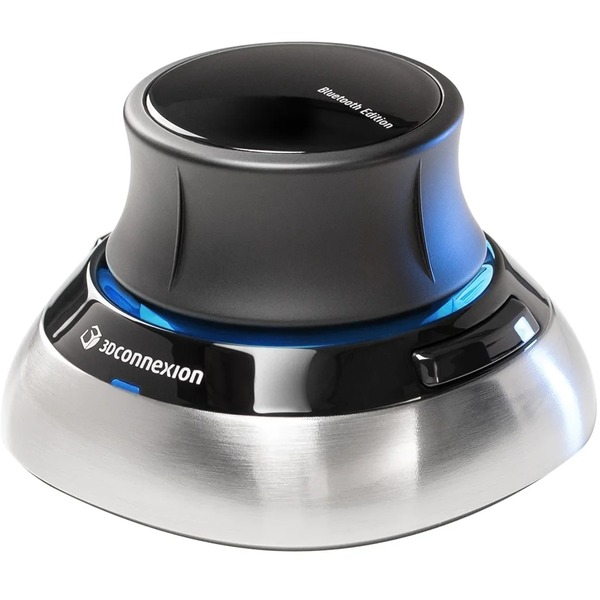
You can move an object in your scene with the SpaceMouse's multiple control axes cap. To learn more about SpaceMouse, visit the manufacturer's website 3dconnexion.com. For install instructions and troubleshooting tips, see the dedicated Hardware: SpaceMouse page.
Quick setup a SpaceMouse as manipulator:
To control an object with a SpaceMouse, complete the Manipulator component, start the simulation and operate the SpaceMouse cap. Follow these steps and tips to set up.
- Connect your SpaceMouse, wireless or wired. No special driver is required.
- Open your project in XR Twin and select the User in the Hierarchy panel (left).
- In the Inspector panel (right) click Add Device button (at the very bottom), keep SpaceMouse selected (default) and click Add manipulator to user button.
-
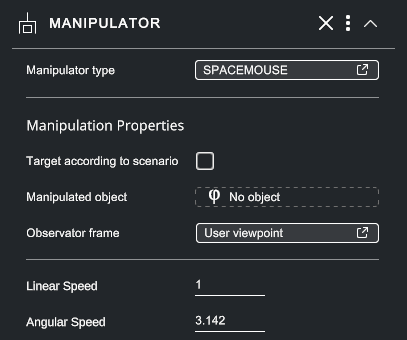
A new MANIPULATOR component is added in the Inspector panel, with SPACEMOUSE as Manipulator type.
-
In the MANIPULATOR component:
- While keeping the User selected, drop the node you want to manipulate from the Hierarchy panel in the Manipulated Object slot (must be physicalized first).
- Select your Observer frame preference to change the reference directions.
- Adjust Linear Speed as a displacement multiplier (0 to lock translations),
- Adjust Angular Speed as a rotation multiplier (0 to lock rotations).
- See Manipulator properties and Observator frame sections below for more details.
- Click the Start button to launch XR Twin's Simulation mode.
As long as you're in Simulation mode:- You can operate the SpaceMouse's multi-axis cap to manipulate the designated object.
- You can change linear and angular speed multipliers dynamically. Just select the User in Hierarchy and change the values.
- You can change the Observator frame option dynamically.
SpaceMouse with scenarios
If you're playing a scenario, you can check Target According to scenario so that the object concerned by the current step is automatically linked to your SpaceMouse. You can activate/deactivate this feature dynamically during simulation.
As an alternative, you can use the Elastic Manipulator at any time during a simulation to move the designed object or other physicalized objects with your mouse. This feature is available only with a Desktop user.
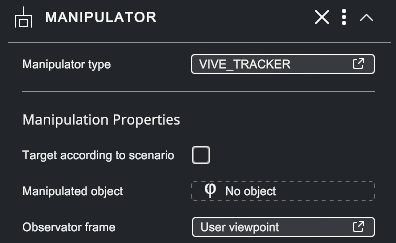
Vive Tracker#
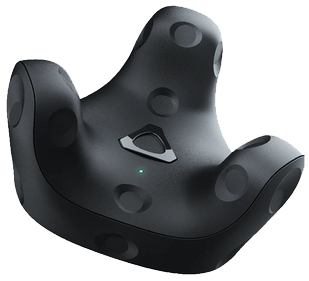
A Vive Tracker gives you the opportunity to track a 3D model and move it in your scene accordingly. The virtual tracker is "attached" to an object (must be physicalized first).
[This feature has not yet been implemented. Coming soon...]
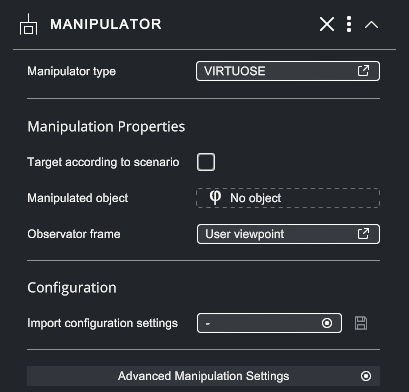
Virtuose#

Produced by Haption, Virtuose are force-feedback devices for physical interaction with virtual worlds. To use a Virtuose arm, see the Hardware: Virtuose section, the Haptic devices specific section or the manufacturer's support website www.haption.com.
Quick setup a Virtuose as manipulator:
To control an object with a Virtuose force-feedback haptic arm, add a device on the User, complete the MANIPULATOR component and options, start the simulation and move the handle of the device. Follow these steps and tips to set up.
- Set up the Virtuose hardware and software.
- Launch XR Twin, open your project and select the User in the Hierarchy panel.
- Add a Device (same as above). Select Virtuose.
- Complete Manipulation Properties (see Manipulation Properties and Observator frame below).
- Complete Configuration settings if needed (you can import an .xml configuration file, or save one when you are satisfied with your settings to reuse for an other XR Twin session).
- Set up all Advanced Manipulation Settings. See Haptic devices chapter for complete settings description.
- Click the Start button to launch XR Twin's Simulation mode.
As long as you're in Simulation mode, you can:
- Move the Virtuose handle to manipulate the designated object.
- Change the Observator frame option dynamically.
Manipulator Properties#
For each additional device, you will find the same Manipulation Properties sub-section.
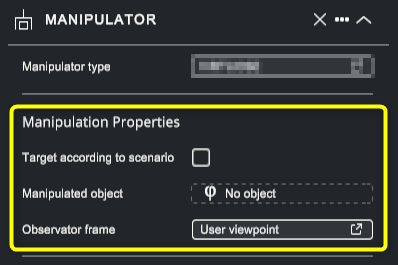
- Manipulator type#
The selected manipulator device (SpaceMouse, Tracker or Virtuose).
- Target According to Scenario#
If you want to automatically set the manipulator according to the current object in active scenario task, check Target according to scenario. This is only relevant to scenarios involving multi-placing actions.
- Manipulated Object#
The object to be controlled with the device. Select the object you want to manipulate in the Hierarchy panel and drop it into the Manipulated object slot (default: no object). You have to physicalize it first.
- Observator frame#
Next to Observator frame, click to select your Observator preference (see Observator Frame below),
SpaceMouse, specific properties#
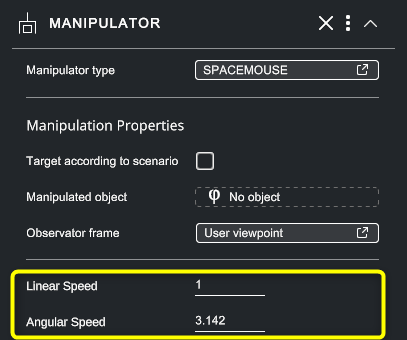
- Linear Speed#
Linear Speed acts as a multiplier for translation speed. Set the Linear Speed to 0 to lock the translations and apply the SpaceMouse's cap rotations only.
- Angular Speed#
Angular Speed acts as a multiplier for rotation speed. Set the Angular Speed to 0 to lock rotations and apply SpaceMouse's cap translations only.
Virtuose, specific properties#
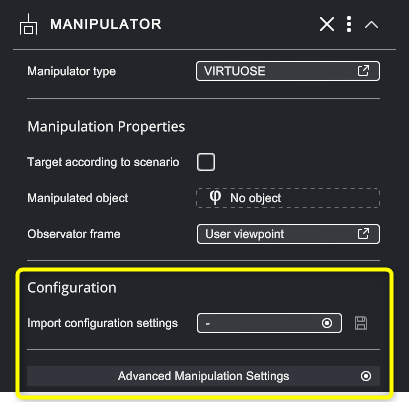
- Import configuration settings#
Click on Import configuration settings and browse to either load an existing XML configuration file, or you can set a new configuration from scratch.
- Advanced Manipulation Settings#
Click on Advanced Manipulation Settings to open the corresponding pop-up.
In this pop-up, settings are displayed in 3 tabs.
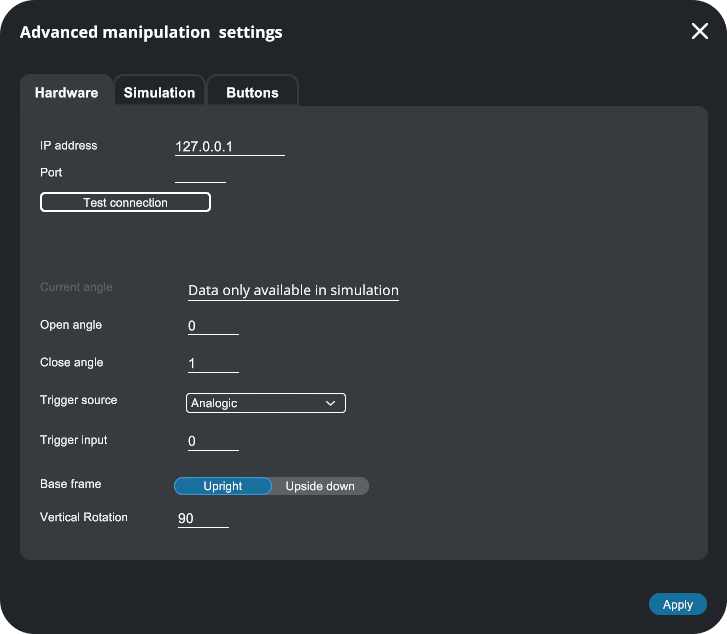
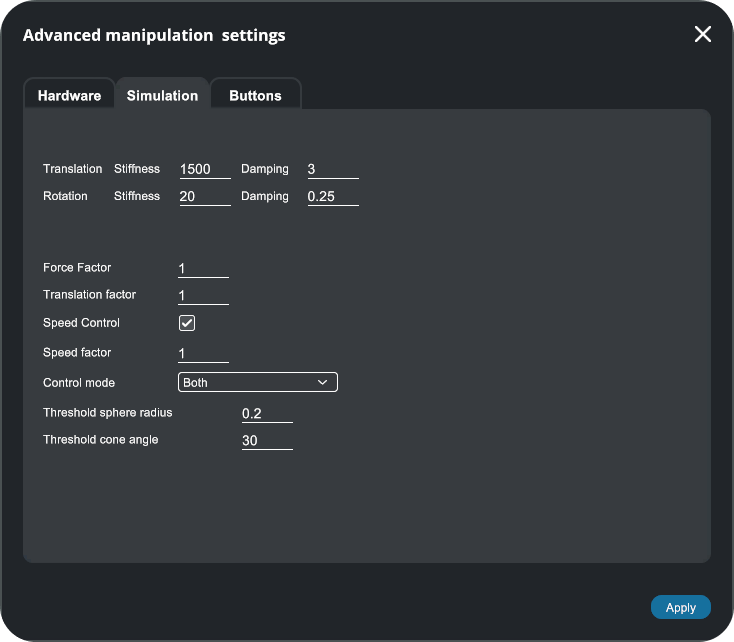
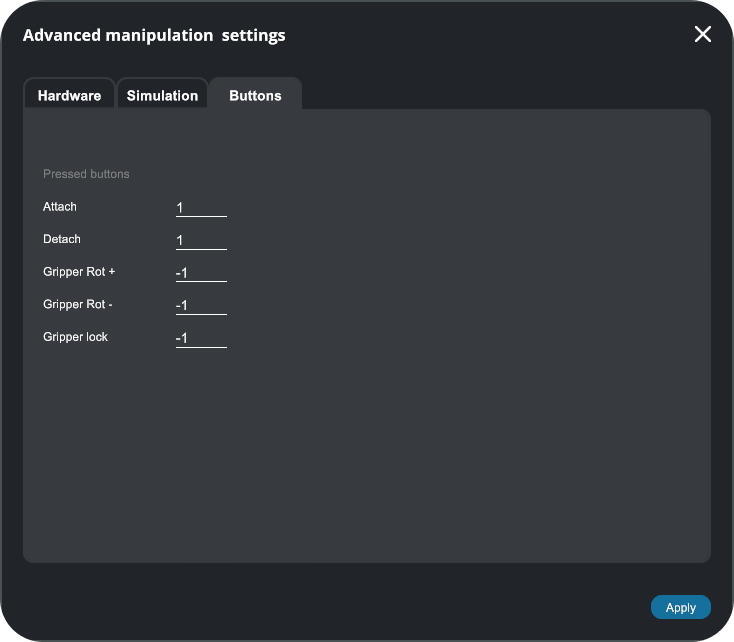
See Hardware tab, Simulation tab and Buttons tab in the Haptic devices chapter for details.
Observator frame#
For each additional device, you can select the way you align your device axes with the VR axes (VR headset, the desktop camera, or a third-view camera) or the World global axes of your virtual scene.
The selected Observator frame option defines the forward and upward axis of the device.
To select your Observator Frame preference:
-
From your MANIPULATOR component, next to Observator Frame, click to open the Observator frame pop-up.
-
Select one of the 3 options. See description below.
-
Click Save observator settings to close the pop-up.
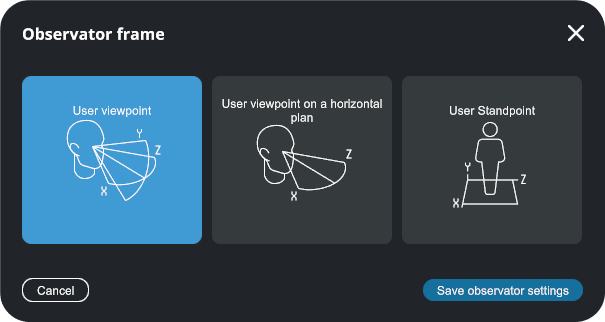
- User viewpoint#
When set to User Viewpoint (default), the manipulator's forward and upward axes align with the user's perspective. This means that the manipulator's orientation corresponds to the direction the user is facing, as well as the upward direction from that point of view (user space).
- User viewpoint on a horizontal plane#
When set to User Viewpoint on a Horizontal Plan, the behavior is similar to the previous one, but it is projected onto a horizontal plan.
Who is the User ?
The User's perspective (or user space) corresponds to the desktop camera space in a Desktop simulation and to the headset space in a VR Headset simulation, even if you switch to third-person view (the VR User has priority).
- User StandPoint#
When set to User Standpoint, the manipulator's forward and upward axes are aligned with the global coordinate system of the virtual environment (world space). This setting is useful for certain applications that require consistent, predefined manipulator orientations.
Change Observator frame during simulation
You can switch Observator frame option during simulation. Axes are updated after clicking Save observator settings button.