How to create a laser pointer, compatible with INTERACT and Unity UI ?
You want to use some Unity UI while running your INTERACT simulation. Like our VR Menu, entirely made with Unity UI and customizable, you can trigger any action with Unity events.
But our UI pointer is by design only visible on our VR Menu or by choosing the mode "LaserGrab".
In this article, we present you a simple way to add an UI button and a permanent laser to interact with it.
Pre-requisites
- A Unity scene with an INTERACT simulation and VR player.
Add an Interactable UI Button
- Add a Canvas. From the main menu, select GameObject > UI > Canvas.
-
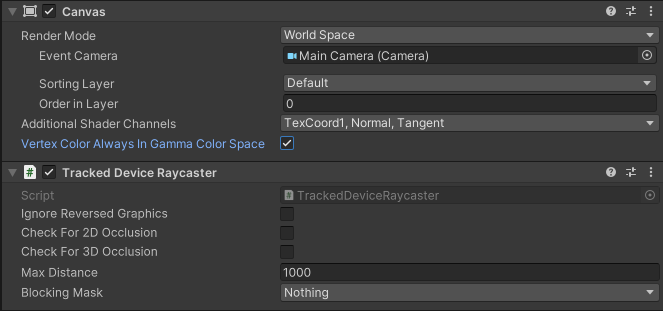
With the Canvas selected, in the Inspector tab:
- Add a Tracked Device Raycaster component.
- Change the Render Mode to World space. Then adapt the Width, Height and Position as desired.
- In the Hierarchy tab, expand [Player_1] > Devices > OpenXR > Head > Main Camera and drop it in the Event Camera slot.
-
Add a button as a child of the Canvas your created, resize it by changing the X and Y Scale's (Z not needed).
-
Add a Box Collider as a component of your button and make sure that it correctly fits your button.
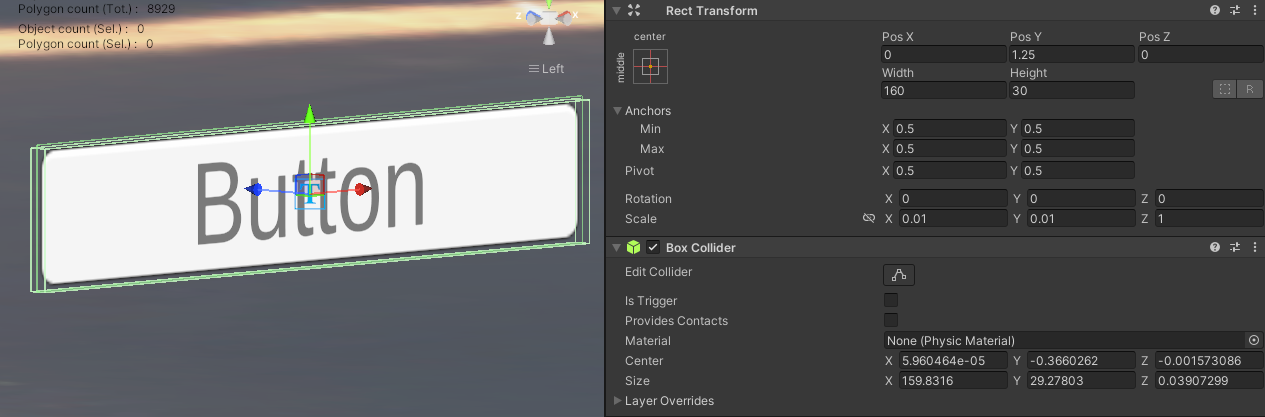
Resize the collider
Directly typing the size into Box Collider to adjust will help at first.
-
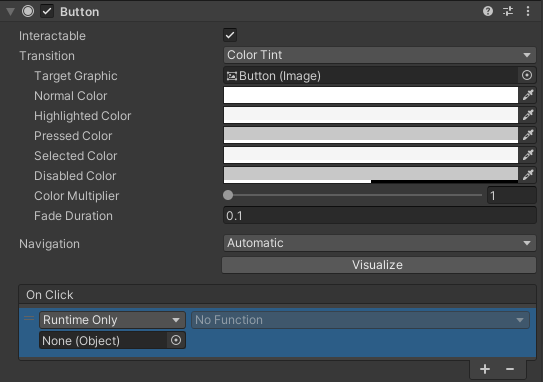
You now need to add your instruction to the button when it is clicked. Go to Button and in the Button component click on the + button to add your new instruction.
Make a permanent Laser
- In the Hierarchy tab, go to [Player_1] > VRMENU > Modes.
-
Copy the VRLaserManipulator element.
-
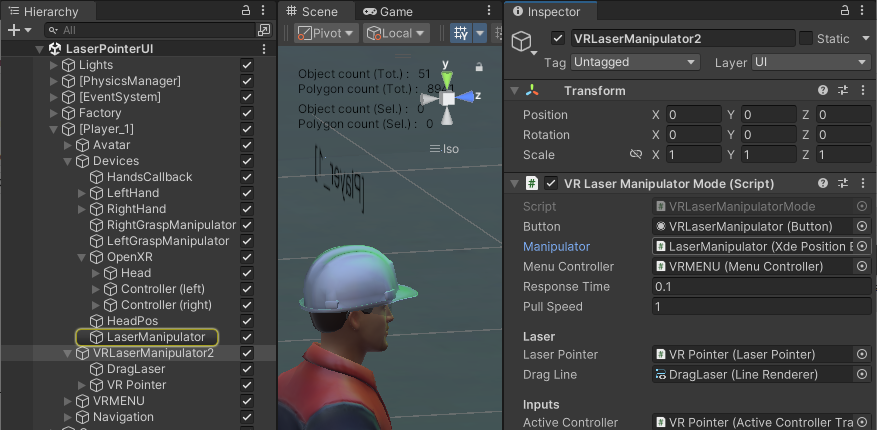
Drop it as child of [Player_1]. You can rename it as VRLaserManipulator_2 and make it enabled.
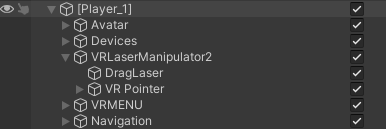
-
Expand VRLaserManipulator_2 and select VR Pointer. In the Inspector tab, in component Laser Pointer > Options, check Active At Start. You can change the color of the new laser in the Line Renderer if wanted.
- In the Hierarchy tab, expand and find [Player_1] > Devices > OpenXR > LaserManipulator. Drop it in the VRLaserManipulator_2 's Manipulator Mode (Script) in the Manipulator slot.