Getting Started
Creating a new simulation
The first thing to do when creating a new simulation is:
- Make sure to start from an empty Unity scene (using top menu File > New scene).
- From the INTERACT top menu, click on INTERACT > Create New Simulation.
- Select your favorite environment (Factory, White Lab or Warehouse). Click OK to confirm.

- Select display device (VR Headset, PC desktop or Cave), depending on equipment available.
- For any VR Headset experience, select which additional tracking hardware combination you want to use (Controllers, Hand & Finger tracking or Body Tracking). Click OK to confirm.

Now look at the 'Hierarchy' tab, 3 objects have been created:
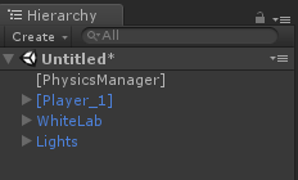
- [PhysicsManager] handles physics simulation settings (linked with the physics server). Its properties should not be modified unless you are an advanced user.
- [Player_1] handles the avatar, VR camera and controllers or hand tracking device. Set its position in the scene (initial position in VR when simulation starts) by selecting it and editing its coordinates (position and rotation) in the 'Inspector' tab.
- Factory is the default environment. Delete default environment if you want to replace it with an environment of your own.
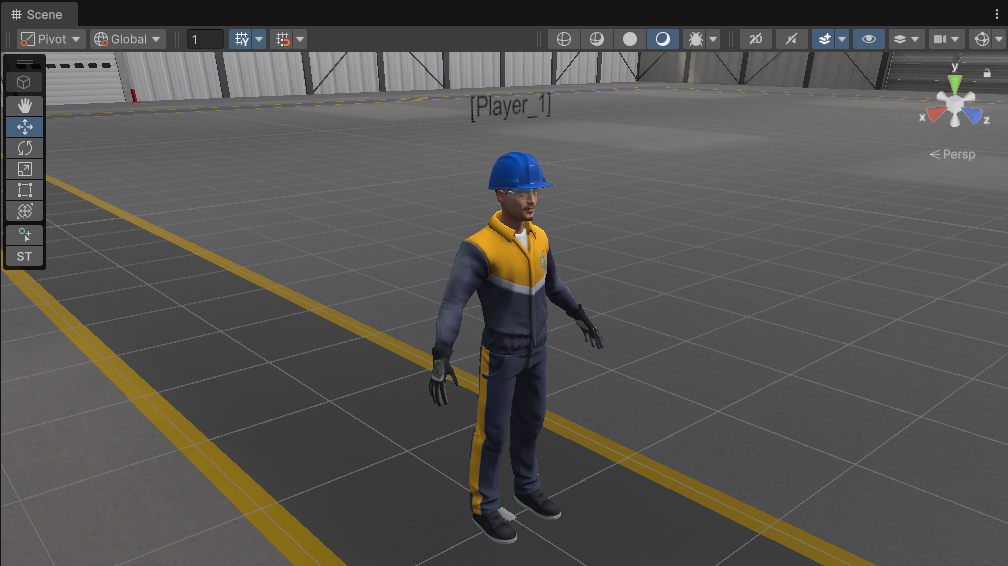
Using desktop player
When no VR device is available or needed, using desktop player is a good option for fast prototyping in order to visualize the scene: select PC (desktop player) from the Add Player menu.
With a Desktop player, you can customize the desktop camera commands to map the movements of popular CAD software:
- When [Player_1] is selected, check its Desktop Navigation component in the Inspector tab.
- Set the Navigation property from Unity, Solidworks, Catia, SketchUp, Revit and Inventor.
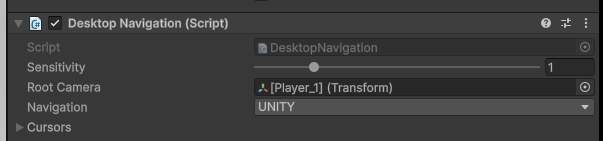
Desktop Navigation Sensitivity
The Sensitivity parameter (see image above) controls how responsive the camera navigation is to mouse movements. Adjust this value to customize camera control speed.
Below a summary table of the commands of the main CAD software that can be used in INTERACT:
| Unity style camera controller commands | |
|---|---|
| Rotate view | Right Button (to rotate around camera axis) or Alt+Left Button to rotate around last focus point |
| Pan camera | Middle Button |
| Zoom | Scroll Middle Button |
| Solidworks style camera controller commands | |
|---|---|
| Rotate view | Middle Button |
| Pan camera | Ctrl+Middle Button |
| Zoom | Scroll Middle Button |
| Catia style camera controller commands | |
|---|---|
| Rotate view | Hold Middle Button + Hold Right Button |
| Pan camera | Hold Middle Button |
| Zoom | Hold Middle Button + Press Right Button + Move mouse |
| SketchUp style camera controller commands | |
|---|---|
| Rotate view | Hold Middle Button |
| Pan camera | Hold Middle Button + Hold Left Button or Shift |
| Zoom | Scroll Middle Button |
| Revit style camera controller commands | |
|---|---|
| Rotate view | Shift + Middle Button |
| Pan camera | Hold Middle Button |
| Zoom | Scroll Middle Button |
| Inventor style camera controller commands | |
|---|---|
| Rotate view | Shift + Middle Button |
| Pan camera | Hold Middle Button |
| Zoom | Scroll Middle Button |
Move rigidbodies using the desktop player
Move grabbable objects like in VR by dragging the left mouse button. Rigid bodies need a Unity Mesh Collider in order to be detected by the Desktop Manipulator Tool.
Using VR player
To experience VR, select VR Headset player in the Add Player menu. See VR Player for an introduction to using virtual reality devices, hand and finger tracking devices or full body tracking devices with INTERACT.
Run the simulation
INTERACT allows you to quickly switch from the working session (Unity's Editor mode) to the VR simulation (Unity's Play mode). To do so:
-
In the Unity toolbar, click the Play button
 . This switches to Play mode, launches INTERACT's Physical Engine, and starts the simulation.
 -
Depending on your player:
- With a PC (Desktop) player, in the Game view, use your keyboard and mouse to change the point of view, and your mouse to interact with rigidbodies.
- With a VR Headset player, put on your headset, and visualize the virtual environment at scale 1:1. Use the Navigation modes to move around, your hands to interact with rigidbodies, the VR Menu tools to change navigation mode, jump to teleport anchors, calibrate the player size, take measurements or photos, and more.
Note
Something looks odd? Consult the troubleshooting page to get some help.