VR Player
To simulate your INTERACT scene in Virtual Reality you must use a VR Player:
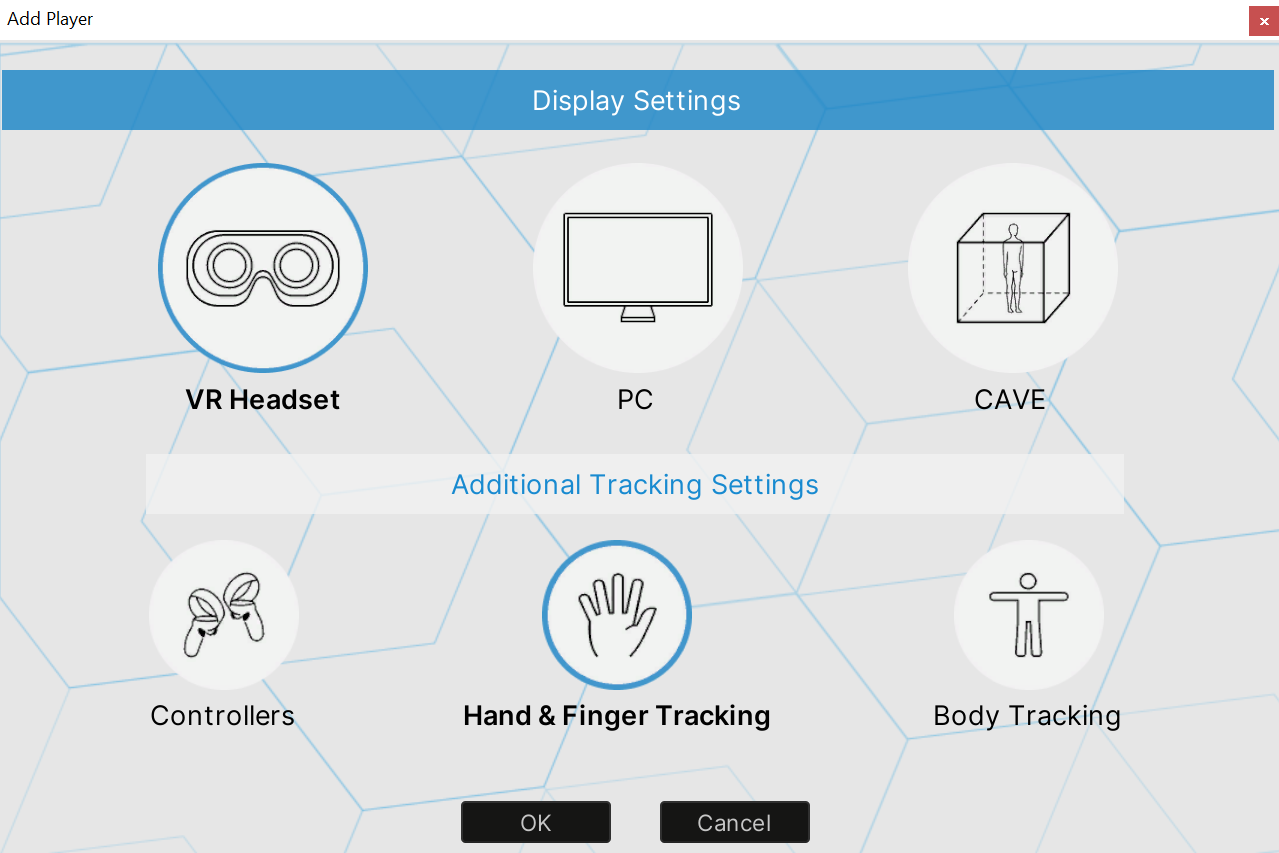
- From the main menu, select INTERACT > Add Player
-
In the Add Player window, select VR Headset as display, then select the additional tracking setting you want to use.

-
Click OK to add the new
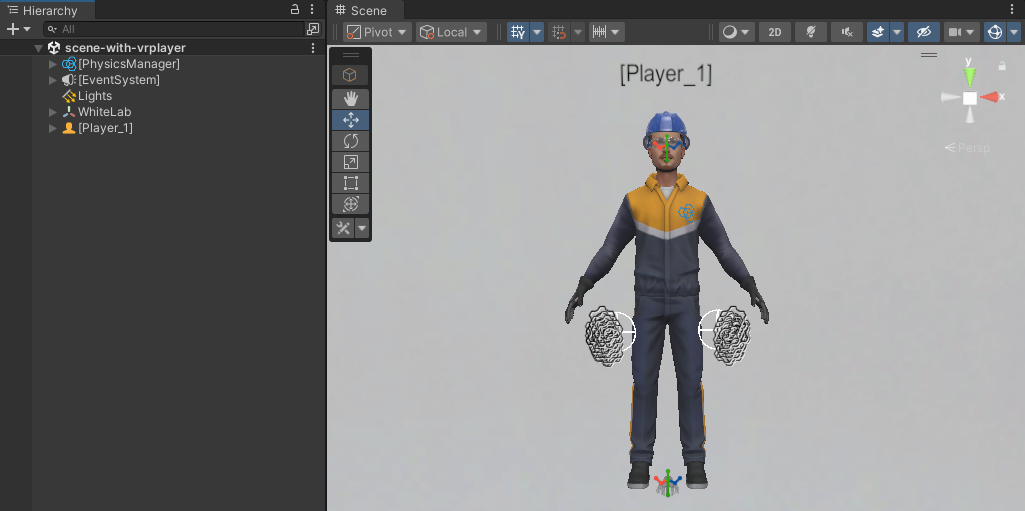
Player_1in the Hierarchy tab. - Launch Unity's Play mode and put on your headset to run in your INTERACT simulation.
Additional Tracking Settings
Choose from the provided options to select the additional tracking setting that should be added to your VR headset to control either your hands or your entire body (see VR Controllers, Hand and finger tracking or ergonomics oriented Body Tracking options below).
VR Controllers
Controllers are selected by default. With this option, the VR Player uses your VR Headset's controllers to track hands and interact with objects.
- Keep default options and click OK
- A new VR player is added to the Hierarchy tab.
VR controllers track hands position and input actions (triggers, joysticks and buttons, see controller bindings). This allows you to navigate in the virtual scene and interact with rigid bodies or VR menu.
Troubleshooting
Make sure that OpenXR is enabled in Edit > Project Settings > XR Plug-in Management when using a VR Player.
Hand and finger tracking 
INTERACT features a VR Player with hand and finger tracking which is suitable to proceed to precise manipulation operations. You can either use your own hands, if your headset is equipped with integrated hand and finger tracking capabilities, or you can use other devices such as Leap Motion or Manus gloves.
- Keep VR Headset selected
- Select Hand & Finger Tracking and click OK
- A new VR player is added to the Hierarchy tab.
You can grab and manipulate objects using your own hands.
Hands interaction with VR tools 
VR tools are now available through VR Menu with hand tracking. Look at your hand palm and point at the toolbox with your other hand to open VR Menu. Teleport is also available through VR Menu while hand tracking is enable.
Troubleshooting
If your hands are not tracked during simulation, make sure your Leap Motion or Manus gloves are correctly setup. Also make sure that you only have one OpenXR Hand tracking extensions running.
Tip
With a headset equipped with integrated hand and finger tracking capabilities, the controllers must be kept stationary and either switched off or deactivated, depending on the model. You can temporarily resume your controllers, which can interrupt hand tracking, but it lets you use navigation mode or a VR tool.
Body Tracking
The Body Tracking option is used for full body motion capture for ergonomics. See Ergonomics.
Navigation
The following navigation modes are available when using VR Player with controllers (required): Teleport, Fly, Walk, Elevator and Rotation. Which controls are activated depends on your equipment and the bindings.
Controller bindings
If the default binding of your controller device doesn't suit your needs, you can edit the Input Actions.
Teleport
The Teleport mode is the default navigation mode when starting the simulation. To teleport your player from spot to spot:
- Press your controller's button or joystick to throw the teleport laser. If you want to cancel, press again.
- Aim with your controller to place the target on the desired landing spot.
- Use the trigger to teleport to desired spot.
To switch from Teleport mode to another mode during runtime, open the Settings tab in the VR Menu and click on the Navigation Mode button to switch between Teleport, Fly, Walk and Elevator mode.
Fly
The Fly mode allows you to navigate: - Go forward or backward by using your controller's joystick/pad up or down. - To choose the fly direction, orient your controller towards your desired position.
Walk 
The Walk mode is an alternative to the fly one, allowing you to move horizontally.
- Go forward or backward using controller's joystick/pad up or down.
- To choose the walk direction, orient controller towards desired destination.
- In Walk Mode, you are always snapped to objects that you hover over.
Elevator 
The Elevator mode is an alternative to the fly one, allowing you to move only up or down.
- Go upward or downward using controller's joystick/pad up or down.
Rotation
The Rotation tool is slightly different. Push the joystick or the pad of your controller left or right to rotate the player step by step in runtime. You can adjust the step angle.
To edit the step angle of the rotation, select [Player_1] > Navigation > Rotation, then in the Rotation Controller component edit the Rotation step property.
Custom script to edit the rotation step 
You can also use a script to modify the value of the following variable :
float Interact.Immersion.Navigation.RotationController.RotationStep
To disable the rotation of the Player, simply disable the [Player_1] > Navigation > Rotation GameObject.
Tracking
INTERACT supports the following tracking devices :
- ART Tracking
- Leap Motion for hand tracking
- Manus gloves
- OpenXR compatible devices