Apple Vision Pro® headset
INTERACT is compatible with all HMDs supported by SteamVR. Since ALVR apps allow you to connect an Apple Vision Pro® to SteamVR via a wired connection or Wi-Fi, you can use your Apple Vision Pro® with INTERACT this way.
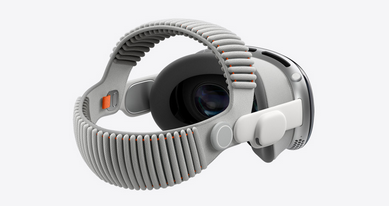
For product overview, visit apple.com/apple-vision-pro/
For product support, visit Apple Vision Pro Support
Prerequisites
- You will need:
- Apple Vision Pro® headset (AVP).
- ALVR app installed on the computer.
- SteamVR app installed on the computer.
- ALVR app installed on the AVP headset.
- A high-end, dedicated Wi-Fi router.
Install & Setup
Requirements and best performance?
Requirements:
- Computer running a compatible OpenVR runtime on Windows
- Apple Vision Pro® must be on the same local network as the computer
For best performance:
- Ensure you are connected to a 5GHz 802.11ac router within 20 feet of your playspace with local network speeds greater than 200Mbps
- Ensure network activity from other devices on your 5GHz router is minimal (if possible, use a dedicated AP for streaming)
- Make sure your streaming computer is connected directly to the router via ethernet
(source: App Store for Vision + search for ALVR app)
Visit wiki/Checklist and wiki/Information and recommandations for more information.
- Set up your Wi-Fi router
It is highly recommended that you use a high-end, dedicated Wi-Fi router (see Requirements and best performance info below).
- Connect your router to the computer with an Ethernet cable.
- Configure your corresponding Ethernet and Wi-Fi connexions so that both Apple Vision Pro® and computer share the same network.
Example of Pv4 addresses: Router: 10.0.0.1, Computer: 10.0.0.2, Vision Pro: 10.0.0.4.
- Install ALVR
What's ALVR?
ALVR are open-source application that makes it easy to stream OpenVR apps from your computer to your Apple Vision Pro® via Wi-Fi, with support for hand gesture input and more [...].
(source: App Store for Vision + search for "ALVR" app)
Find below the main installation steps (on ALVR's web platform, visit wiki pages for detailed installation instructions and more).
- Install ALVR on your computer
- Download
alvr_launcher_windows.zip(on Windows) from the release download page and extract into a path that contains only ASCII characters (english only) and has edit permissions without administrator or root rights. - Run
ALVR Launcher.exe - In ALVR Launcher, press Add version button.
- For default installation, keep channel and version as is and press Install.
Wait until it finishes downloading and installing. - When back in the ALVR Launcher, Press Launch (ignore "Install APK", its for Quest headsets).
- The ALVR Dashboard opens.
-
Press Next several times.
- Read each ALVR Setup Wizard instructions.
- You can skip the microphone step, not needed for INTERACT projects (you can add it later).
- Press Add firewall rules when asked (requires administrator rights).
- When completed, press Finish button.
-
The ALVR Dashboard window will update, waiting for SteamVR and device connections. Let it open.
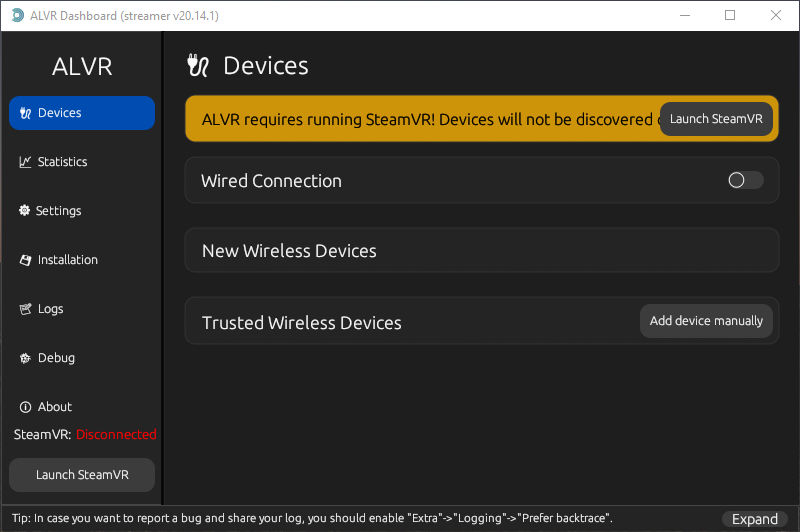
- Install ALVR on your Apple Vision Pro
- Equip yourself with the Apple Vision Pro® headset.
- Open the Settings app and select the Wi-Fi page. Then select a Wi-Fi network that can connect the Apple Vision Pro® to the internet.
- Launch the App Store app, search for ALVR and install it.
- Return to Settings > Wi-Fi and select your dedicated Wi-Fi network.
- Launch the ALVR in-app.
- The ALVR's Main Settings panel is displayed, trying to connecting (see the "Connecting..." message just below the panel).
- Open SteamVR
In ALVR Dashboard, SteamVR connection status is monitoring bottom left. Default is Disconnected. If SteamVR is already open and connected, skip this section.
- On the computer, start SteamVR.
- Wait for connection (if Headset Not Detected, see tip below).
- After connecting, monitoring change for Connected in the ALVR Dashboard...
- ... and SteamVR window opens with just one icon.
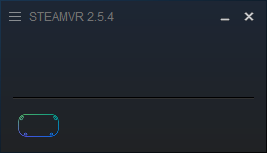
If first launch failed, start SteamVR again...
First time launch will result in SteamVR being empty (Headset Not Detected or waiting ring) and ALVR Dashboard will not connect. Close SteamVR and start again. It will have registered driver and should work (for other troubleshooting information, refer to the wiki/Troubleshooting) section.
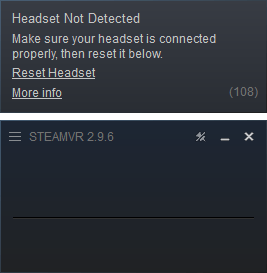
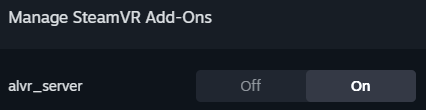
You can also check alvr_server status (click here to see more...)
You can check the status of alvr_server in the SteamVR Settings window. Go to Startup/Shutdown and click on Manage Add-Ons. In the Manage SteamVR Add-Ons pop-up window, make sure that alvr_server is turned on. Sometimes add-ons can be blocked. Click to unblock.
- Add new device
When you open the ALVR in-app in the Apple Vision Pro®, the headset device will be detected by the ALVR Dashboard (on the computer). Keep the Apple Vision Pro® on your head.
If your headset is detected:
If detected, your device is listed under New Wireless Devices in the ALVR Dashboard (2168.client.alvr in image below).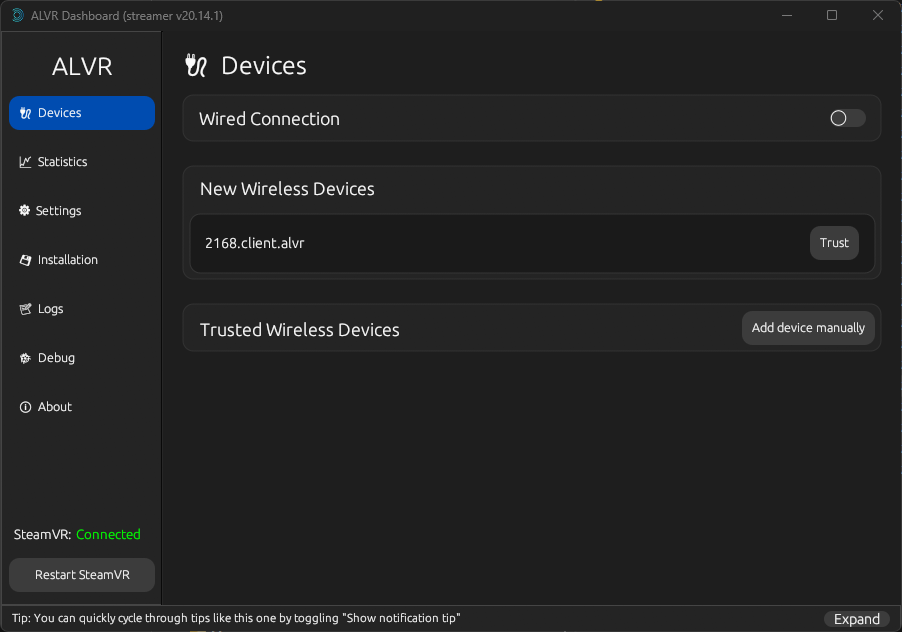
- Click Trust. Your device moves under Trusted Wireless Devices.
- Click Edit.
- In the Edit connection window, the headset's Hostname has been filled automatically. Just click Add new and change for the headset IP address (
10.0.0.4in our example). - Then click Save.
If your headset is NOT detected:
If nothing appears below New Wireless Devices.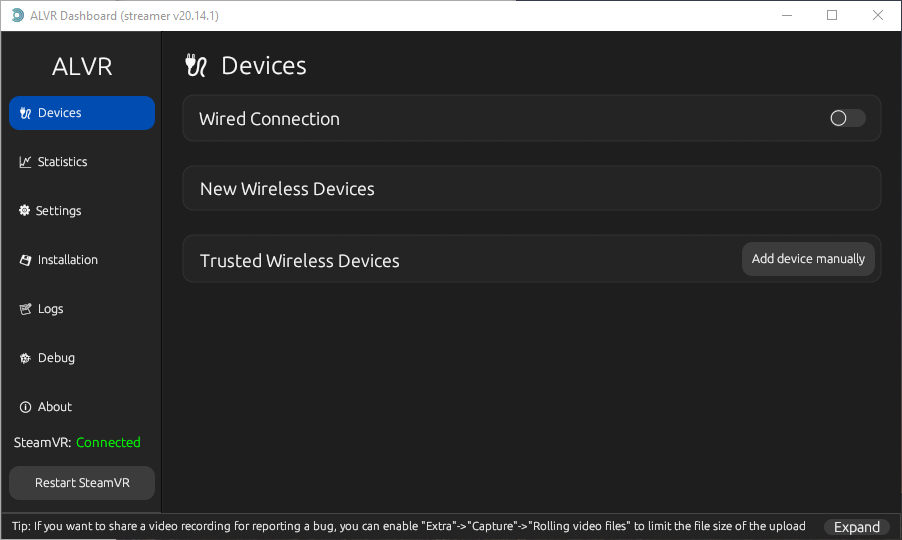
- Click Add device manually.
- In the Edit connection window, enter the headset hostname. Click Add new and replace with the headset IP address.
NOTE: Use the headset's Hostname and IP address displayed at the bottom of the ALVR panel. - Click Save to close the window.
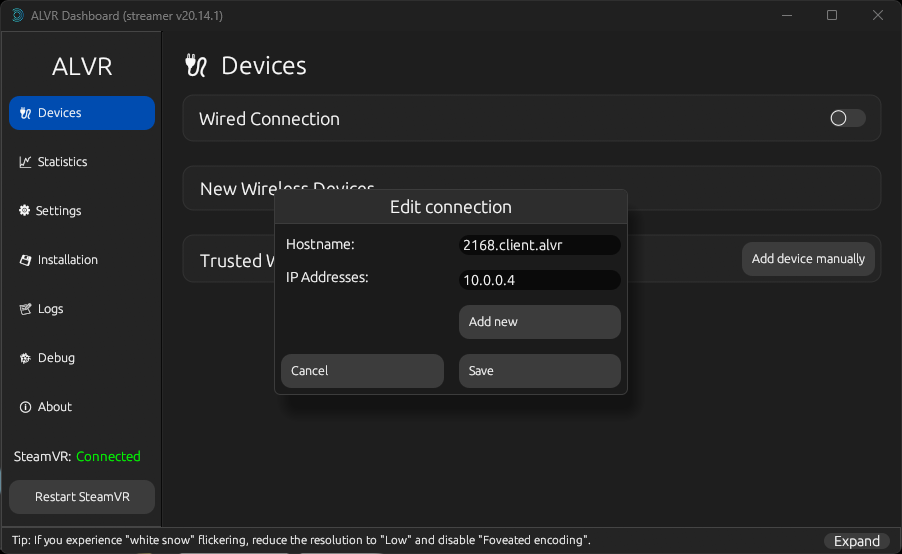
In both situations, your device is added under Trusted Wireless Devices.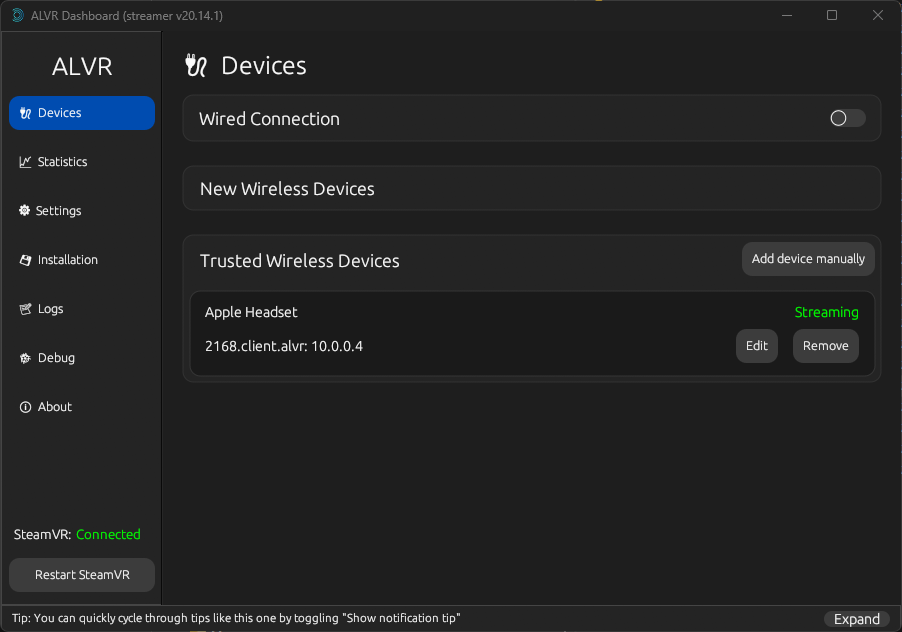
- Unity settings
Open your INTERACT project and check for OpenXR settings in Unity's Project Settings. To restore default settings, see OpenXR Settings.
Apple Vision Pro® setup is now complete.
Start INTERACT VR session
To start streaming an INTERACT VR session, follow this steps.
- Start conditions
Check for start conditions on the computer and the Apple Vision Pro® headset:
-
On the computer:
- Start ALVR launcher.exe first. Click Launch to display the ALVR Dashboard.
- Then, start SteamVR.
-
In the Apple Vision Pro:
- Open the ALVR in-app.
- After connecting delay, note that Enter button is displayed. Wait (start INTERACT simulation before using Enter).
- In ALVR Dashboard, both SteamVR (left) and Apple Vision Pro headset (right) are detected and connected. Monitoring updates:
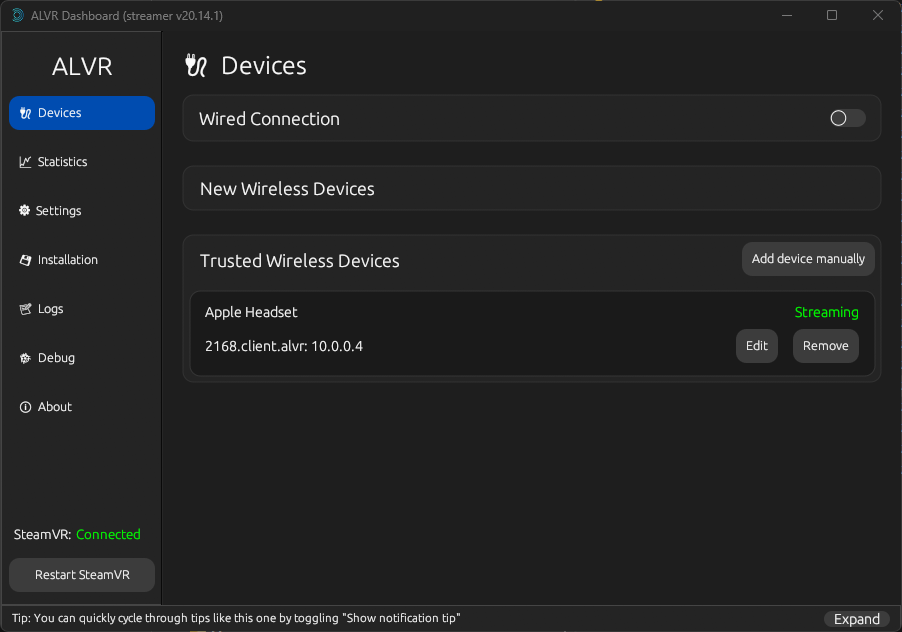
- SteamVR is as Connected (bottom left).
- Headset is Streaming (right) as long as it is on your head (thanks to the presence sensor).
- In SteamVR interface, status is "Standing by". Headset and controller icons are displayed.
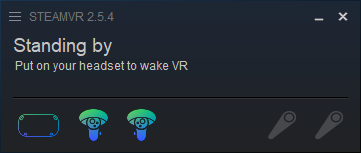
Your devices are ready for an INTERACT VR simulation. You can remove the Apple Vision Pro® headset at any time, even if doing so causes the ALVR in-app to close and lose the connection. When you put the headset back on, just open the ALVR in-app again.
- Start the VR session
- In Unity, open an INTERACT project with a VR Player.
- Switch to Unity Play mode to start the simulation.
- Start streaming
- Equip yourself with the Apple Vision Pro®.
- From within the headset:
- Open the ALVR in-app.
- Below the ALVR in-app's panel, wait for connection.
- When it appears, click Enter button to begin streaming.
- If the Recently Played / Welcome to SteamVR panel is open, use Apple Vision Pro's "tap" gesture twice to close it.
Enjoy to move in your INTERACT VR scene and interact objects with your hands!
SteamVR status
When INTERACT is in runtime (Unity's Play mode), SteamVR status updates with "Now Playing" followed by the Unity project name. Controller icons are gray when your hands are visible to the headset and blue if they are not.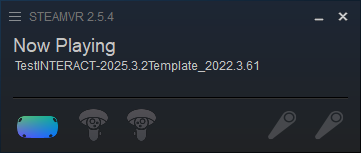
The ALVR panel closes every time you remove the headset
The ALVR in-app panel automatically closes and disconnects you from ALVR Dashboard when you remove the Apple Vision Pro® headset (this is due to the headset's presence sensor). Each time you put the headset back on, you will need to reopen the ALVR in-app and wait a few seconds for it to reconnect. When the Enter button reappears, you are back and can click it to reenter the simulation.
OTHER FEATURES AND TIPS
Passthrough
You can use the chroma keyed passthrough capabilities of your Apple Vision Pro® to see your real environment behind your VR rendered 3D models and enjoy augmented reality!
To set up Apple Vision Pro® Chroma Key Passthrough settings:
- In your Apple Vision Pro®
- Equip yourself with the Apple Vision Pro® headset and launch the ALVR in-app.
- Left of the Main Settings panel, open Advanced Settings panel.
- The Enable Chroma Keyed Passthrough property must be active (toggle is green).
- Click the color circle right of the Chroma Key Color property to open the Chroma Key Color pop-up. Select the Sliders tab and set the RGB sliders to (0, 200, 0) respectively. Click the (+) button to save this color for future reuse.
Note: Set the same RGB color as for you Unity scene background (see just below).
- In your INTERACT scene:
- In the Hierarchy tab, expand to select [Player_1] > Devices > OpenXR > Head > MainCamera.
- In the Inspector tab, find the Camera component and set properties:
- Clear Flags =
Solid Color.
- Background = green color with RGB values as (0,200,0) respectively.
Note: Set the same color as for the headset Chroma Key Color (see above). Alpha value is ignored.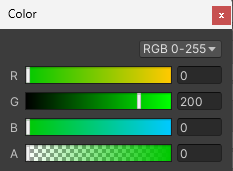
- Clear Flags =
Optimize ALVR configuration
Although the default settings allow you to enjoy the immersive experience with Apple Vision Pro, feel free to adapt the numerous ALVR Dashboard's Settings to optimise performance. Begin with wiki/Settings tutorial by github.com.
You can find other tips and suggestions online. For example, visit getting started with alvr on vision pro by reddit.com.
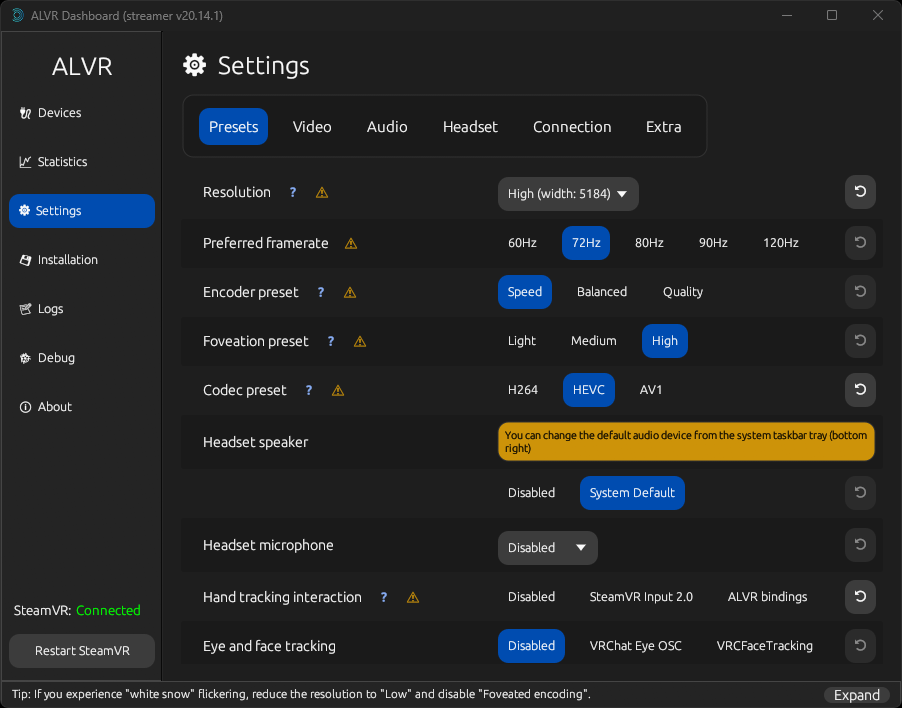
Most of the settings require to restart SteamVR to be applied. SteamVR can be restarted automatically
Most changes to the ALVR settings require SteamVR to be restarted to be applied. ALVR restarts SteamVR when you click the "Restart SteamVR" button on the bottom left corner, or automatically when your Apple Vision Pro® connects again.
If your version of SteamVR is not up to date, ALVR will launch the Steam app automatically to allow you to update it. If you are using an offline version of SteamVR or do not want to update, remember to interrupt this process and restart your SteamVR app manually.
AVP tips
Use gestures with Apple Vision Pro
Quick passthrough
Press the Digital Crown button twice to switch between your content and a view of your surroundings.
Take a screenshot
Press the top button and the Digital Crown simultaneously to take a screenshot.
Your screenshots are stored in the Photos app.
Record your screen
- Open the control center, then tap record.
- To stop recording, open the control center and tap record again.
Your records are stored in the Photos app.
Watch screenshots and recordings
Use Photos app to display your screenshots and recordings.
Share screenshots or recordings
- Open the Photos app on your AVP headset.
- Tap
 next to the screenshot or record. Tap
  and select an option as AirDrop, Mail or Message.
Quickly reset eye and/or hand settings
Click the top button (left) four times very quickly, then follow the instructions. Alternatively, go to Settings > Eyes and Hands and select Reset Eye Settings or Reset Hands Settings, then follow the instructions.
Top button
The Top button is a physical control located on the upper left side of the Apple Vision Pro. You can press the top button once to open the Capture app, press it twice to make purchases, and use it in combination with the Digital Crown to force apps to close and to turn off the Apple Vision Pro.
Digital Crown
The Digital Crown is a physical control on the upper right side of the Apple Vision Pro. You can turn it to adjust immersion or volume, press it once to open the home view, and press it twice to switch between your content and a view of your surroundings.
Turn on
Press and hold the button until the Apple logo appears on the watch face (the power cable indicator light will also turn on).
Turn off
Press and hold the top button and the Digital Crown simultaneously until the Shut Down panel appear, then drag the slider to turn off the device. Alternatively, go to Settings > General > Shut Down.
The Force Quit Applications panel will appear first: continue holding.
Force to restart
Press and hold the top button and the Digital Crown simultaneously for a long time until the Apple Vision Pro turns off. Remove the headset to begin the restart.
The Force Quit Applications panel followed by the Shut Down panel will appear first: continue holding until the screen goes black.
INTERACT tips
VR simulation using hand tracking
- Open the Home view. Press Digital Crown one to open the AVP's Home view. Streaming stops and yous surroundings are displayed.
-
Resume streaming. From the Home view, restart ALVR, wait for connection and tap Enter to resume simulation.
-
Open INTERACT's VR Menu. From within the simulation, face your right palm inward. When the Menu button appears, push with opposite finger to open VR Menu. You can then use the laser to select an option or move the menu closer and tap option buttons with your hand.