PICO 4 Ultra Enterprise headset
The Pico 4 Ultra Enterprise headset is designed for businesses and professionals. Equipped with mixed reality features, this next-generation MR VR headset offers a highly accurate immersive experience.
[PICO. PICO 4 Ultra Enterprise. Retrieved February 25, 2026, from https://www.picoxr.com/global].
For product overview, visit picoxr or pico4-ultra.
For support, visit PICO business > Documentation.
Prerequisites
To stream you INTERACT simulation to a PICO 4 Ultra Enterprise headset, you will need:
-
A PICO 4 Ultra headset
-
A PICO Business account
-
PICO "Business Streaming" software installed on the PC. To download, click PICO business and navigate to Documentation > PICO Business Streaming > Business Streaming 2.1, then scroll and download latest PC version.
-
PICO "Business Streaming" app installed on the headset (pre-installed).
-
SteamVR app installed on the PC. Download it here: Steam store (Steam account needed) or install an offline version.
-
A cable for USB wired streaming. For cable requirements visit USB wired streaming in the PICO documentation.
-
PICO 4 Ultra is compatible with a Wi-Fi 7 wireless connection. It is strongly recommended to use a dedicated router, Wi-Fi 6 or better.
Setup
- Turn on your PICO 4 Ultra
- Link headset to the PC for USB wired streaming, or ensure headset and PC share the same Wi-Fi network
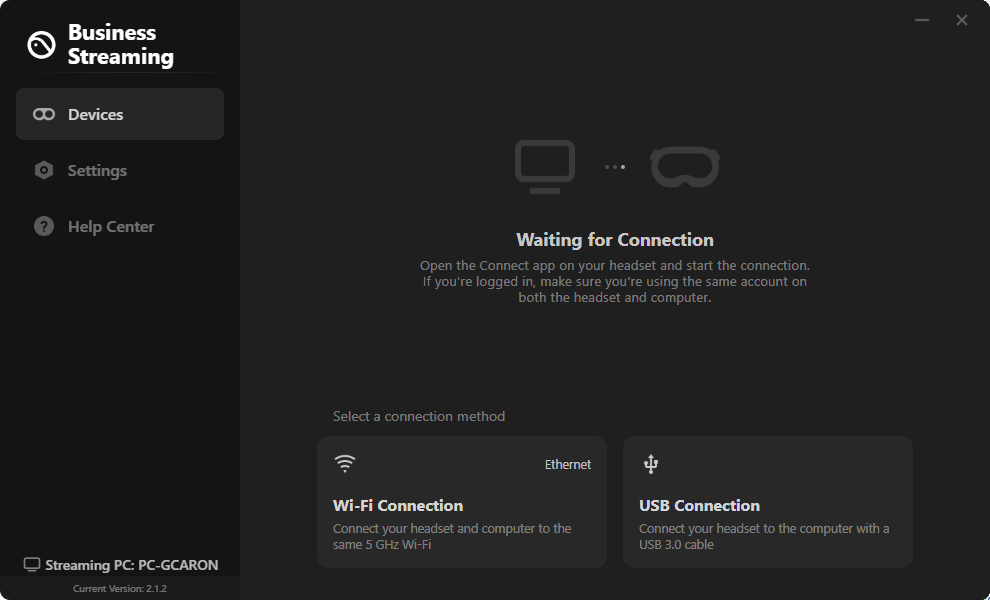
- On PC, open PICO Business Streaming on PC (status: Waiting for Connection)
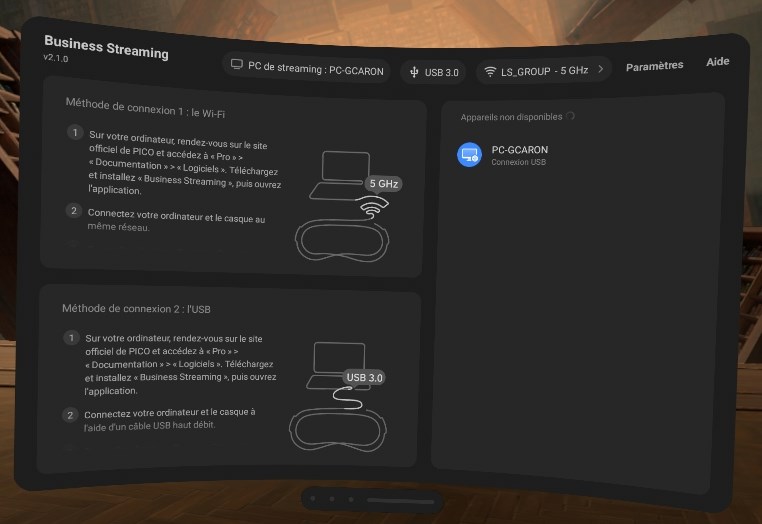
- From the Headset Home menu, start the Business Streaming
 app
app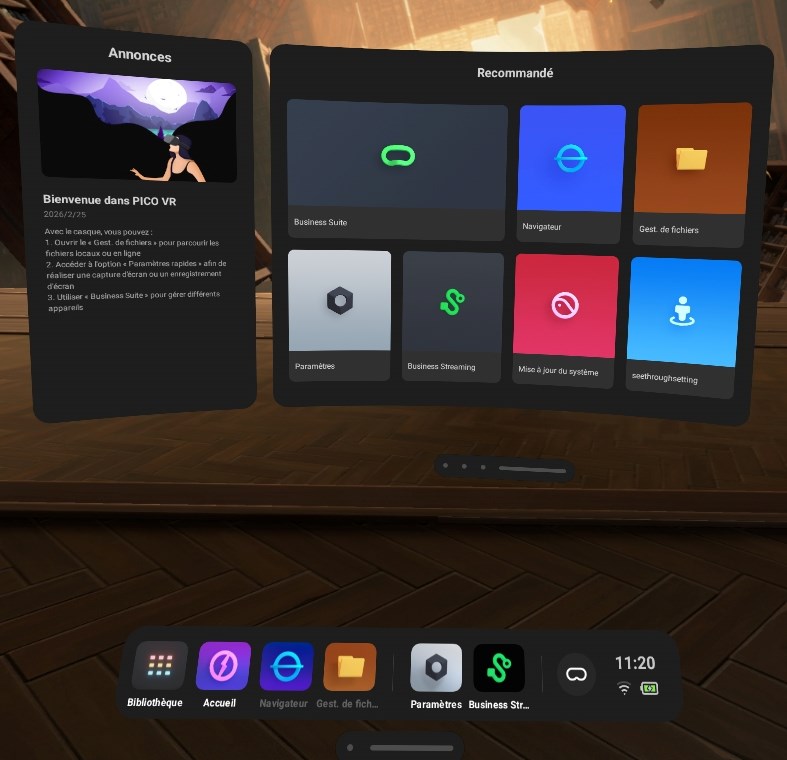
-
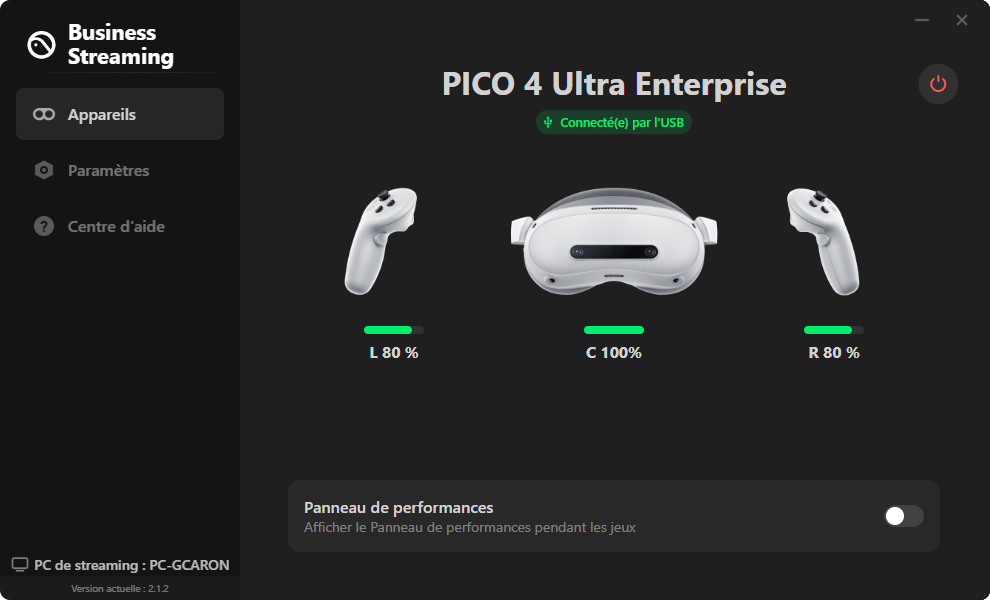
On the PC, headset and controllers are connected
-
On PC, starting SteamVR is optional (automatically closed when streaming starts)
When setup is complete, you can open your INTERACT project and start simulations.
Settings
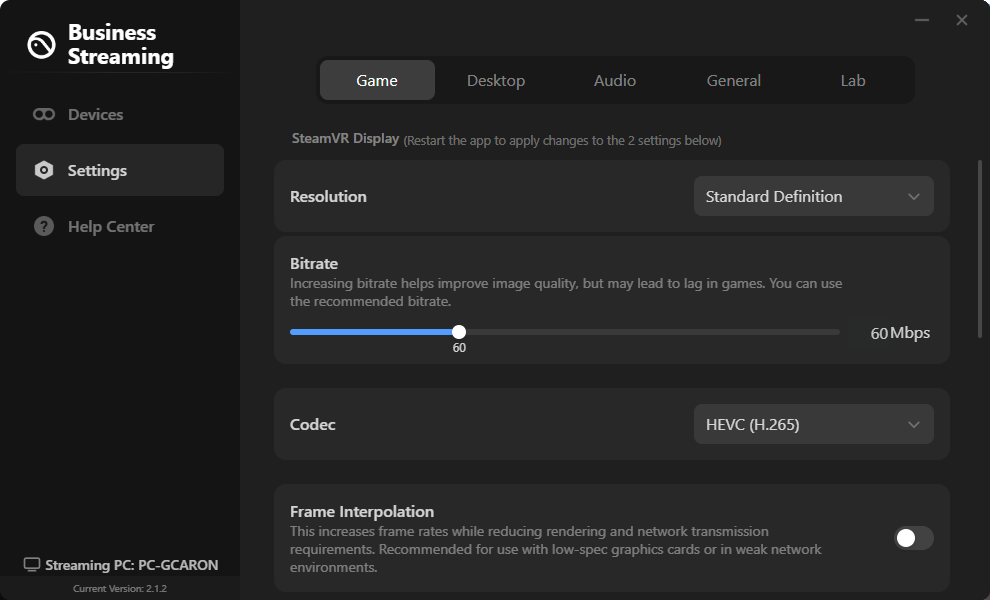
PICO Business Streaming
Use default settings. Feel free to adjust.
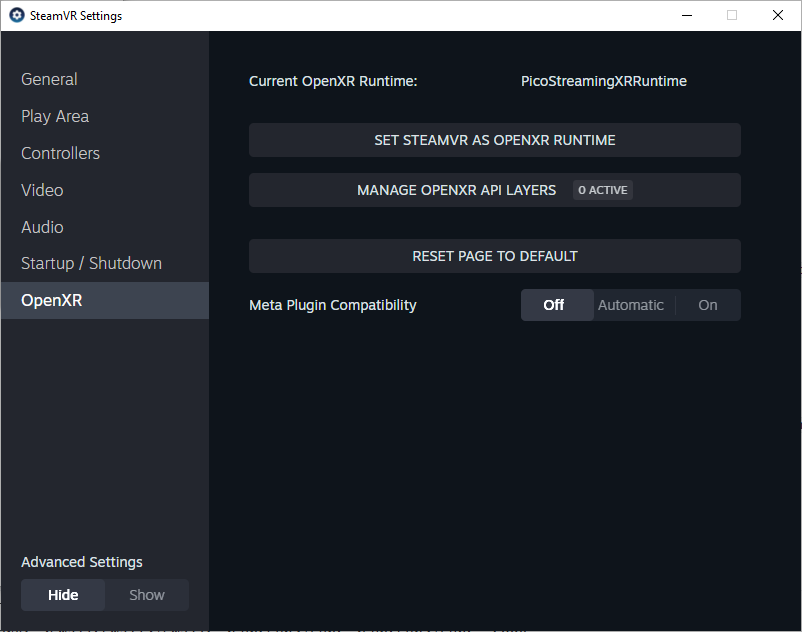
SteamVR settings
PICO Business Streaming use a specific Open XR runtime. To check before streaming, open the SteamVR menu and navigate to Settings > OpenXR. PicoStreamingXRRuntime must be the Current OpenXR Runtime.
The SteamVR UI displays the headset. Depending on what is detected, controllers or hands are displayed too.
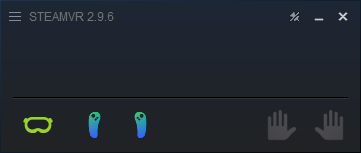
You can close SteamVR (will be closed automatically when streaming starts).
Unity settings
No specific Unity settings.
OTHER FEATURES AND TIPS
Find here some useful features and tips.
PICO tips
Headset
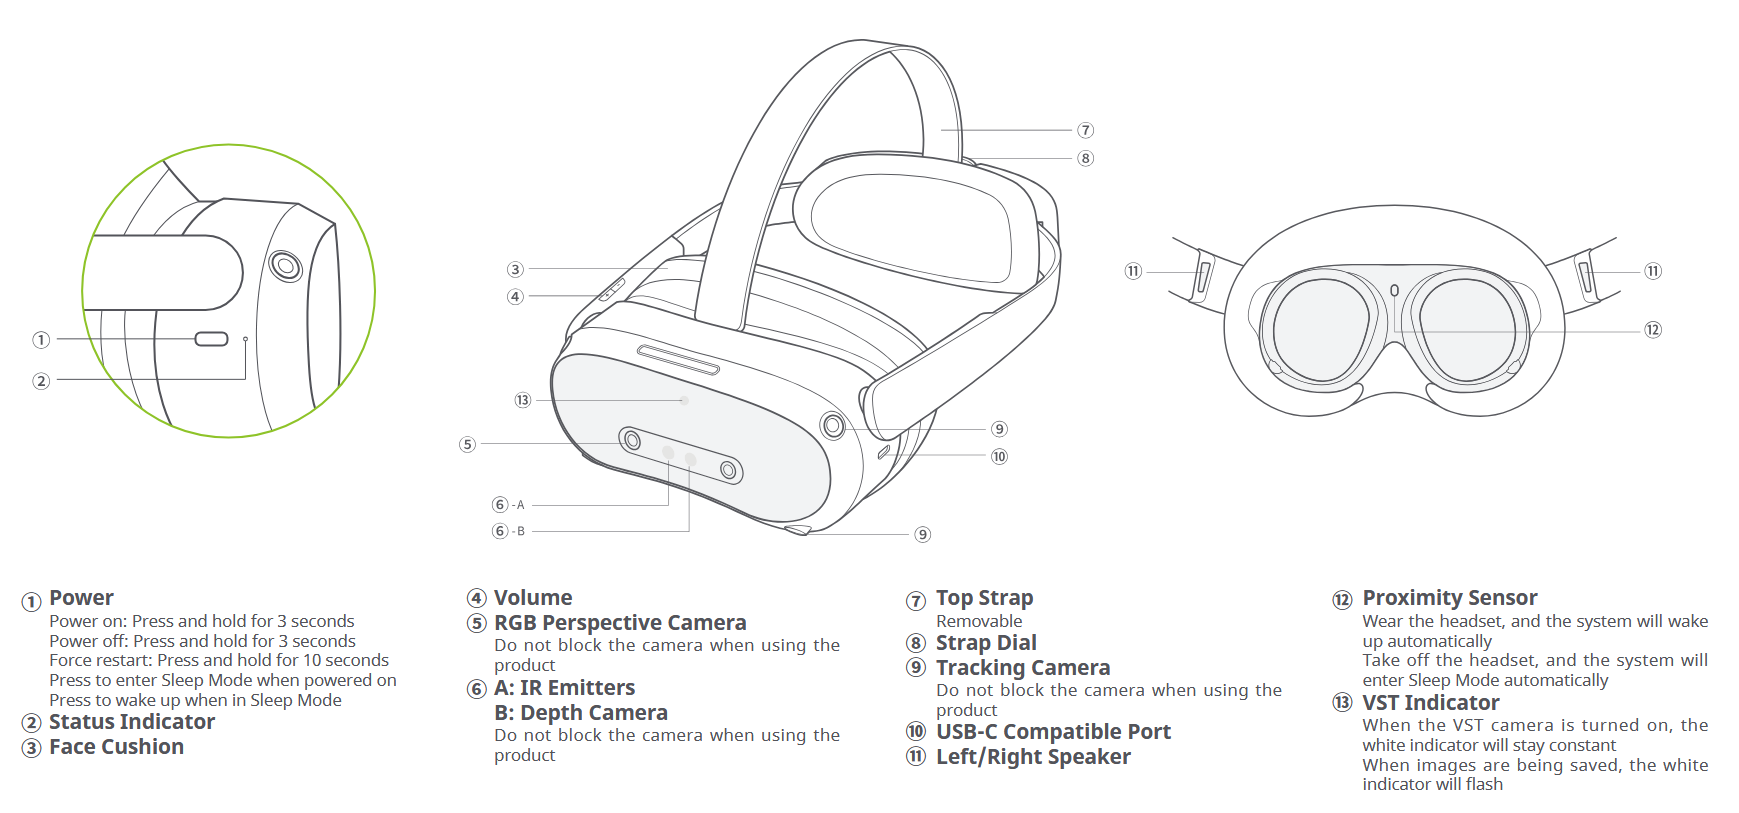
| Function | Action |
|---|---|
| Power button (headset right side) | |
| Power on | Long press for 2 seconds (on the headset right side) |
| Power off | Long press for 5 seconds |
| Hardware reset | Long press for 10 seconds |
| Enter sleep mode or wake up | Short press |
| In the PICO system settings | |
| Adjust the interpupillary distance | In System Settings, go to “Settings” ► “Display” to adjust the pupil distance. Tap “+” or “-” to fine-tune the pupil distance until you have a clear view. |
| On the headset shell | |
| Activate Transparent mode | Tap the right side of the headset twice |
Controllers
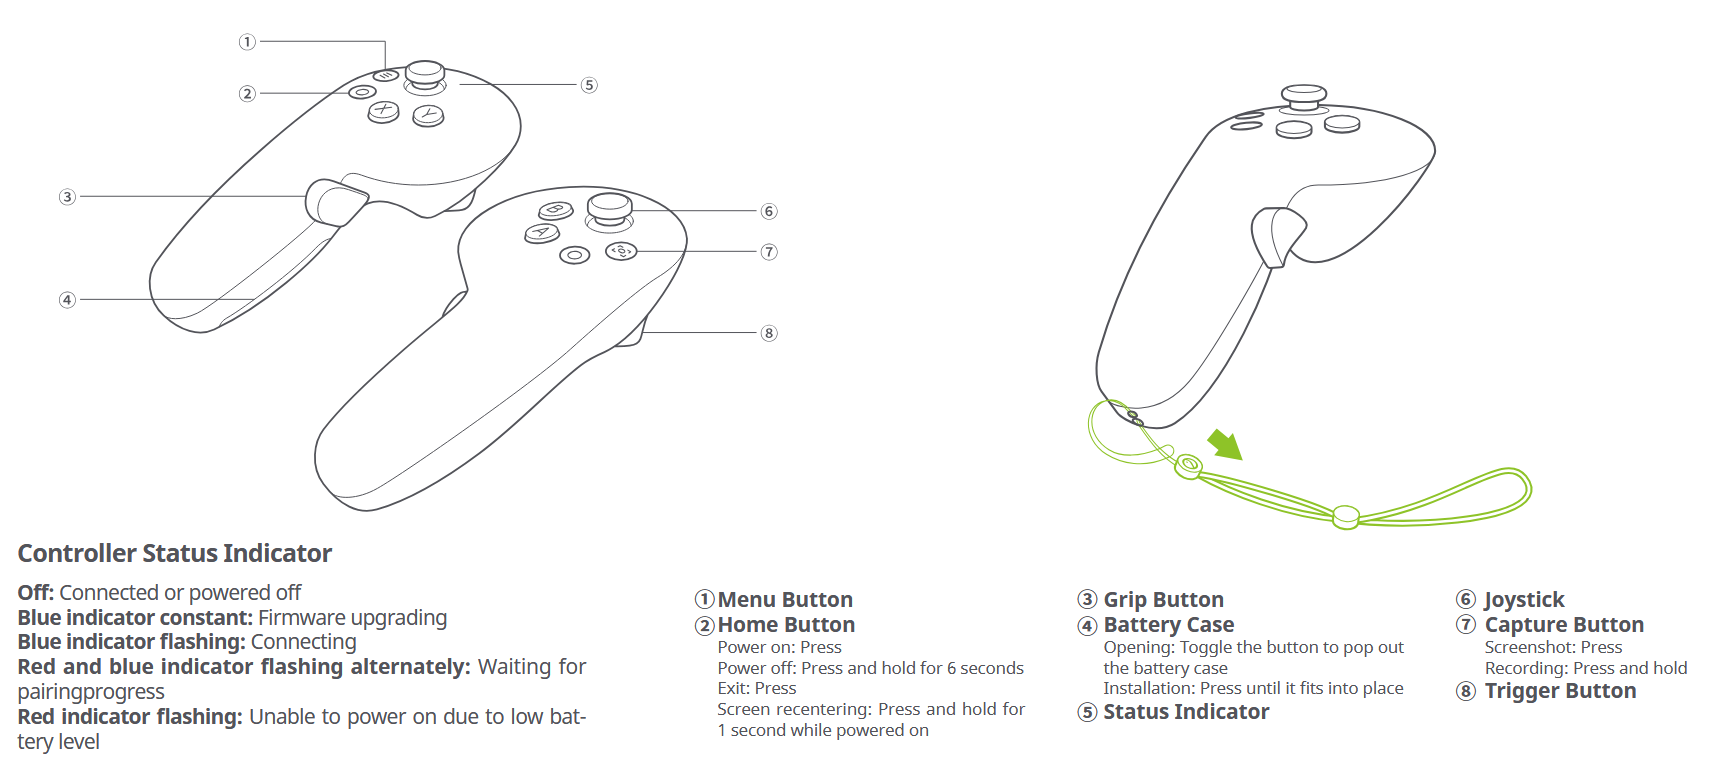
Home button (red circle on left controller)
| Function (per button) | Action |
|---|---|
| Home button (red circle on left controller) | |
| Power on | Short press. |
| Power off | Press and hold for 6 seconds. |
| Exit | Short press. |
| Screen re centering | Press and hold for 1 second while powered on. |
| Capture button (domed button on the right controller) | |
| Screenshot | Short press. |
| Recording | Press and hold 2 seconds to start recording. |
| Menu button (domed button on the left controller) | |
| INTERACT VR Menu | Short press (when streaming a simulation). |
| Return | Point to the target inner app window. Short press. |
| Y / B buttons | |
| Close inner app or window | Short press. |
Transferring screenshots and recordings
Its easy to take screenshots and recordings with PICO 4 Ultra headset. Just press the Capture button on the right controller, or use the inner Quick Settings menu.
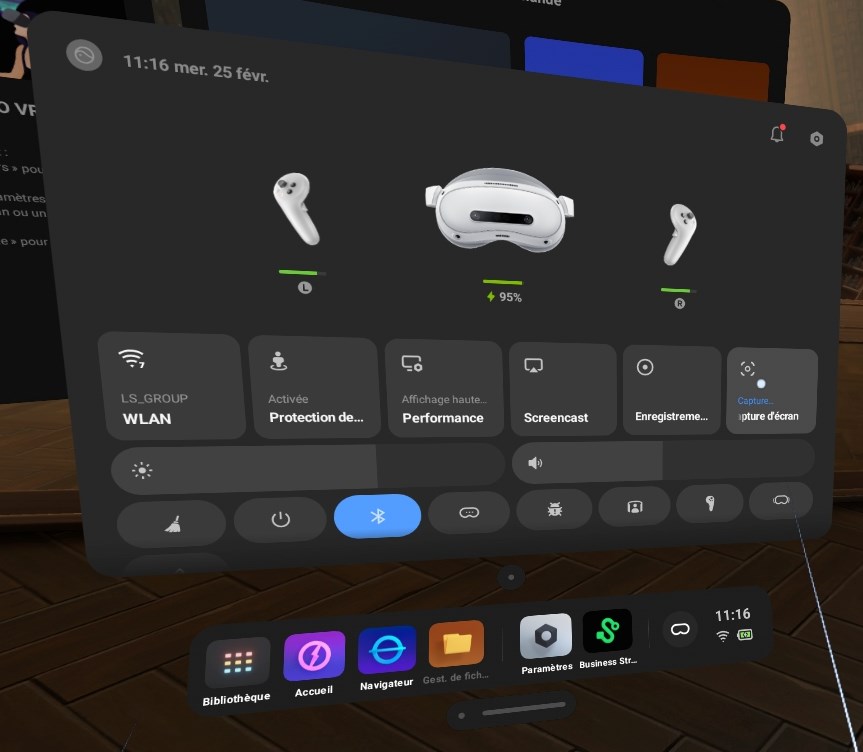
Where are my screenshots and recordings stored?
The files are stored in the headset. You can view them using the Photos inner app. They are stored in All files > Pictures > Screenshots and All files > Movies > ScreenRecording folders (use File Manager inner app).
How can I transfer files to the computer?
Stop streaming and close PICO Business Streaming software. Then disconnect-reconnect the USB cable. If a notification pops, click and select the action you want to execute (first connection). You can use Microsoft Photo or File Explorer to transfer the files (look for PICO 4 Ultra Enterprise as an Android external device).
INTERACT usage tips
VR simulation using controllers
- Click the Menu button on the left controller to open INTERACT VR Menu. Alternatively you can also press X or A buttons. To close the VR Menu, click again.
- Use your hands at any time. For your convenience, you can place both controllers on a flat surface and wait a few seconds for your headset to automatically switch to Hand Tracking manipulations. You may take your controllers back at any time.
VR simulation using hand tracking
-
Open INTERACT's VR Menu. Face your right palm inward. When the Menu button appears, push with opposite finger to open VR Menu. You can then use the laser to select an option or move the menu closer and tap option buttons with your hand.
-
Use your controllers at any time. For your convenience, you can temporarily take your controllers for a walk or fly navigation or for use with other VR tools. Replace both controllers on a flat surface and wait a few seconds for they enter in sleep mode and your headset to automatically switch back to Hand Tracking mode.
Use INTERACT VR Menu during hand tracking session
It is currently not possible to open the INTERACT VR Menu with native PICO gestures. To do so (and more), temporarily switch back to your left controller and press the Menu or X button to display the VR Menu, change options or use tools This will evolve in a future INTERACT version. To resume hand tracking, put down the controller and wait a few seconds (7 to 14) for it to go to sleep.